Connecting Small Parcel to UPS
2.9 min read
|Small Parcel Suite allows you to connect your system to different shipping carriers, enabling you to manage your carrier information. One of the supported carriers of Small Parcel Suite is the United Parcel Service Inc. (UPS).
UPS has launched a new security protocol, oAuth 2.0, requiring your Small Parcel account to reauthenticate its UPS connection. This reauthentication must be completed by August 31, 2024, to prevent shipping disruptions.
This provides instructions on how to connect a UPS carrier account to the Small Parcel Suite. To learn more about the supported providers, features, and services, go to the Shipping with UPS article.
To prepare for the reauthentication of UPS connection, you'll need the following:
- UPS.com username or email account login
- Password of the account
Reauthenticating UPS
- Login to your UPS account at the UPS website.

2. Go to the Accounts and Payment.

3. In the Add a Payment Method dropdown, choose the Add existing account.
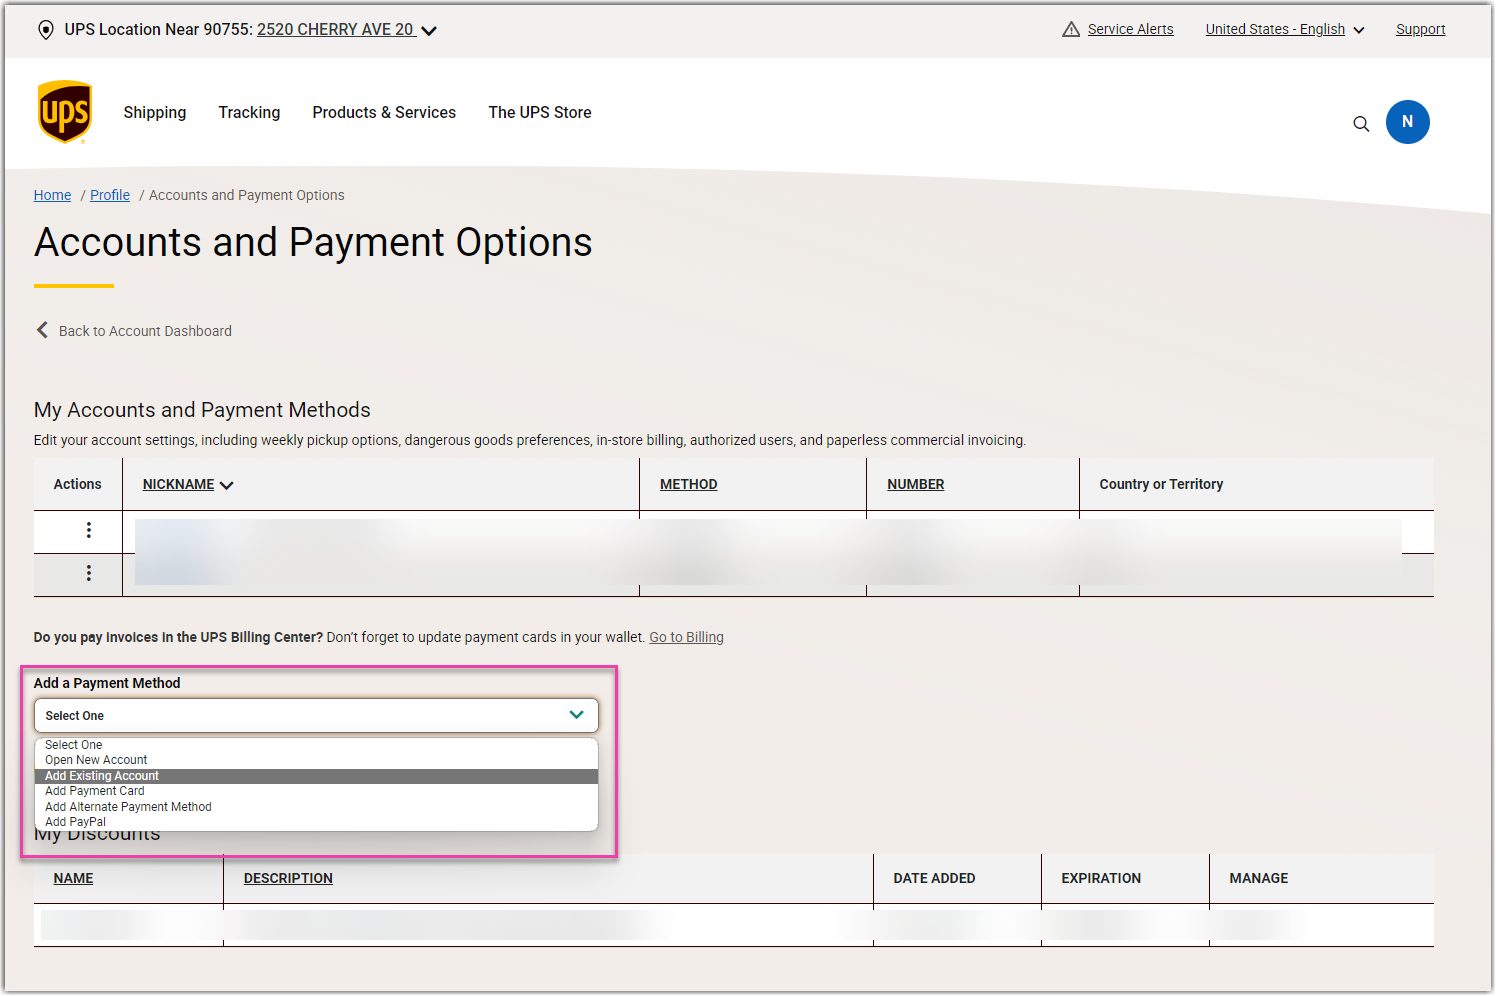
4. Click the Add button.

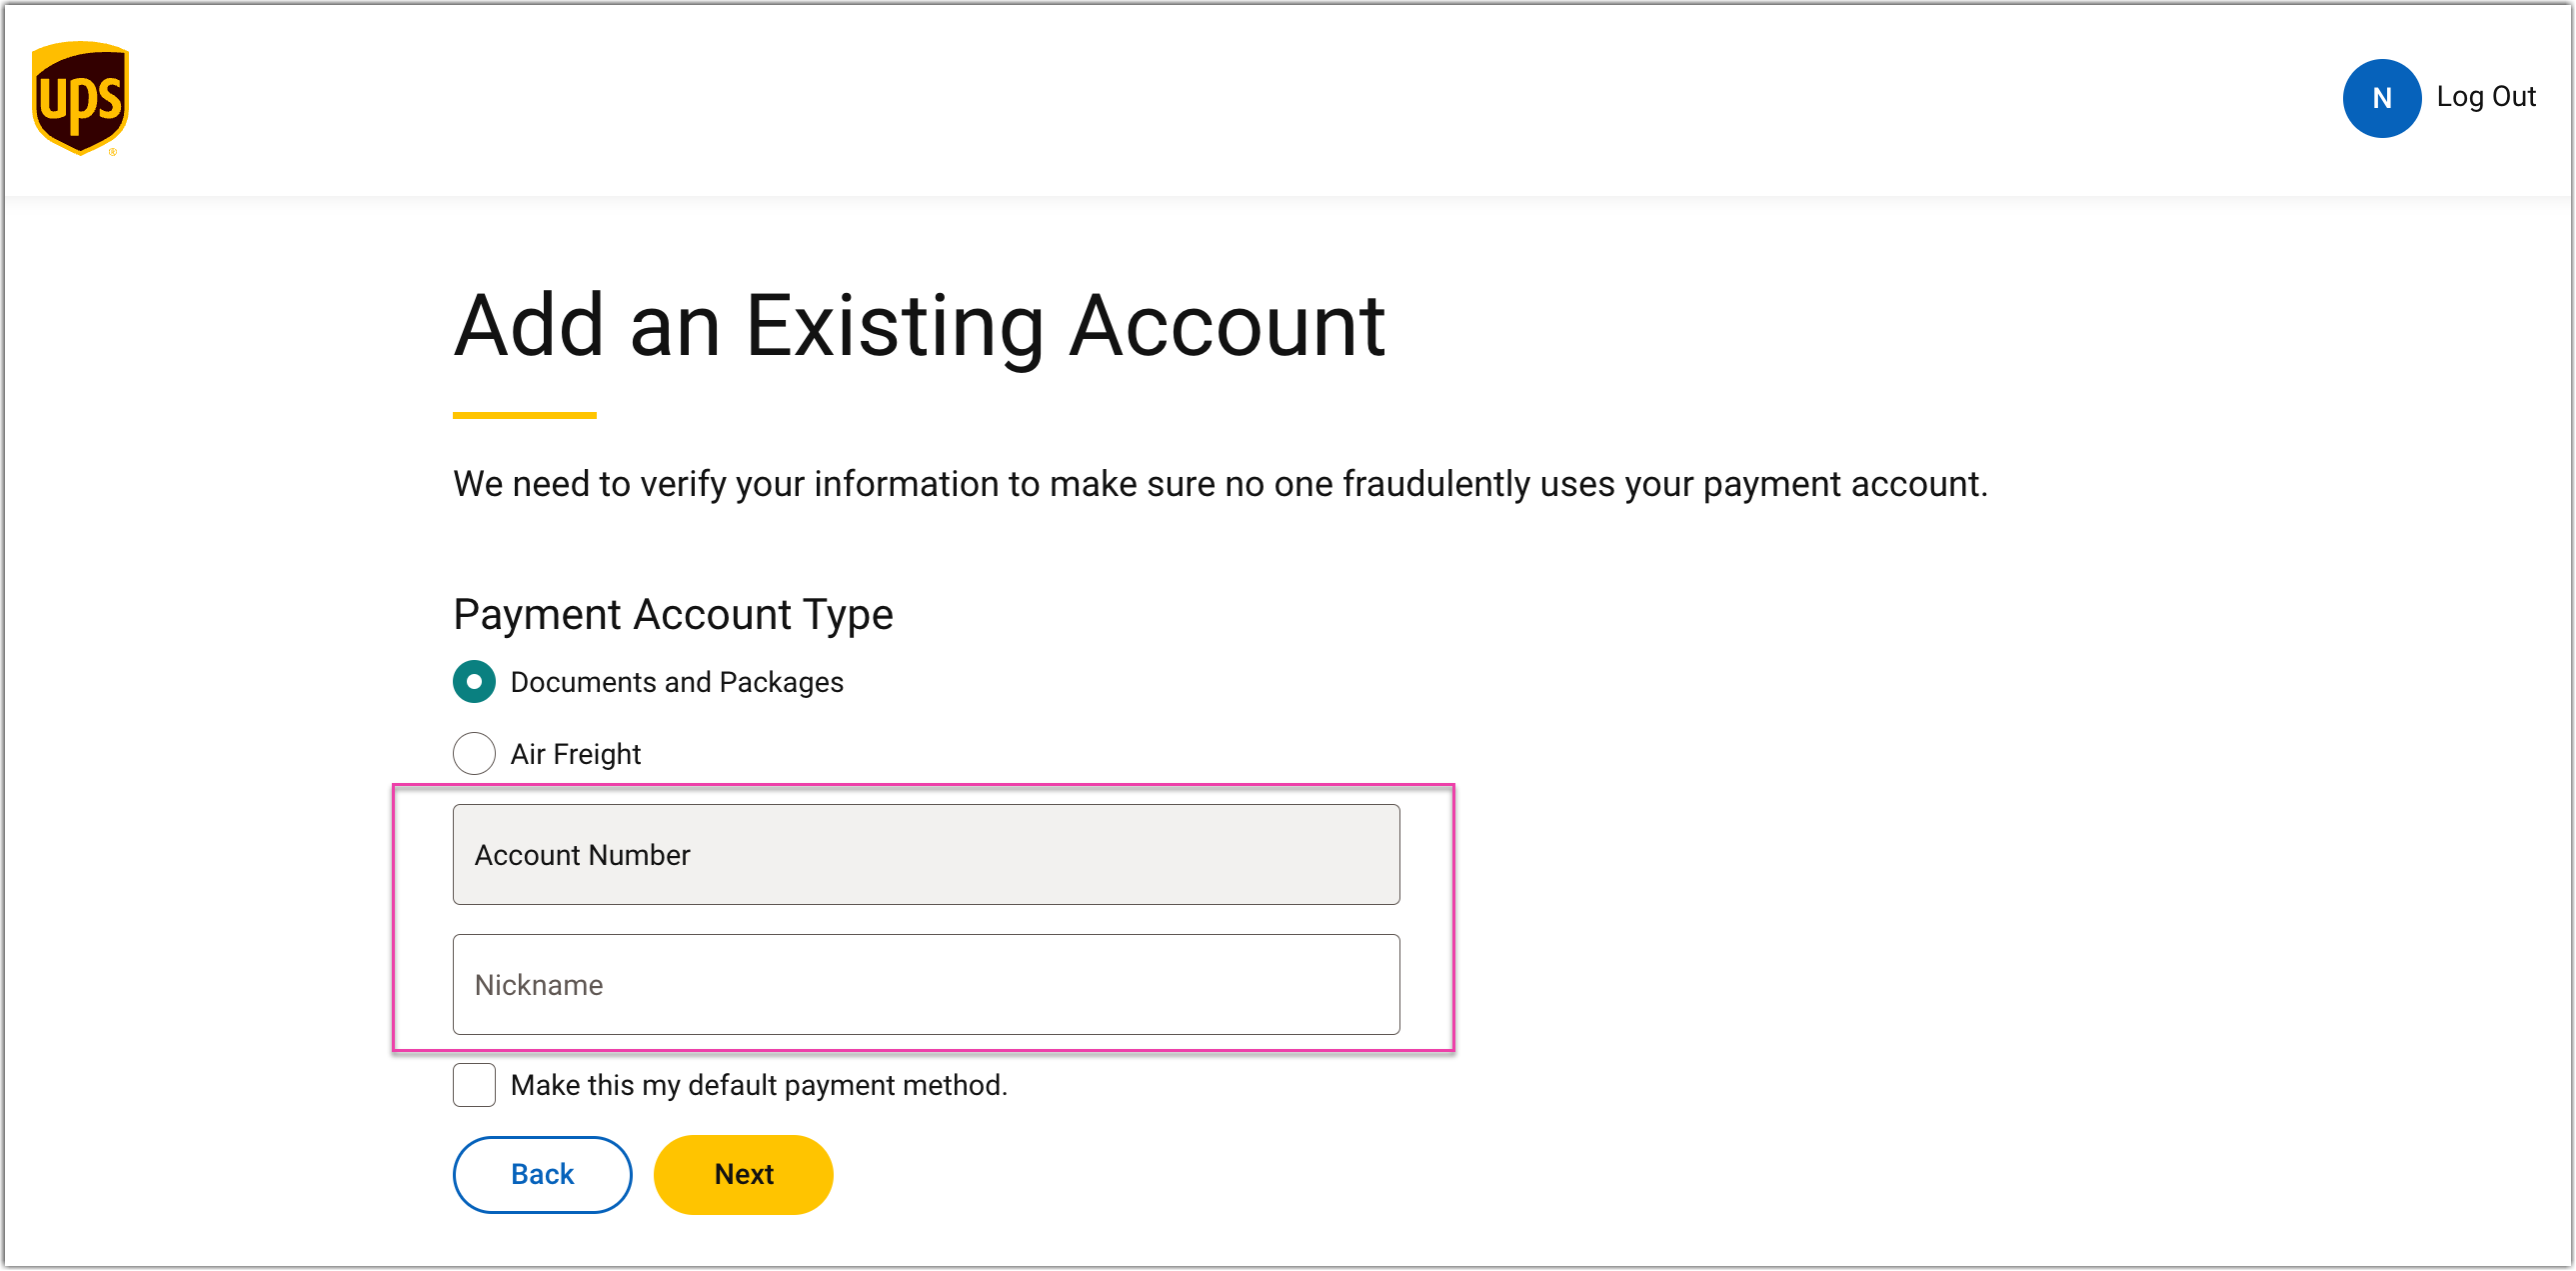
5. Enter your existing account information, and then click the Next button.
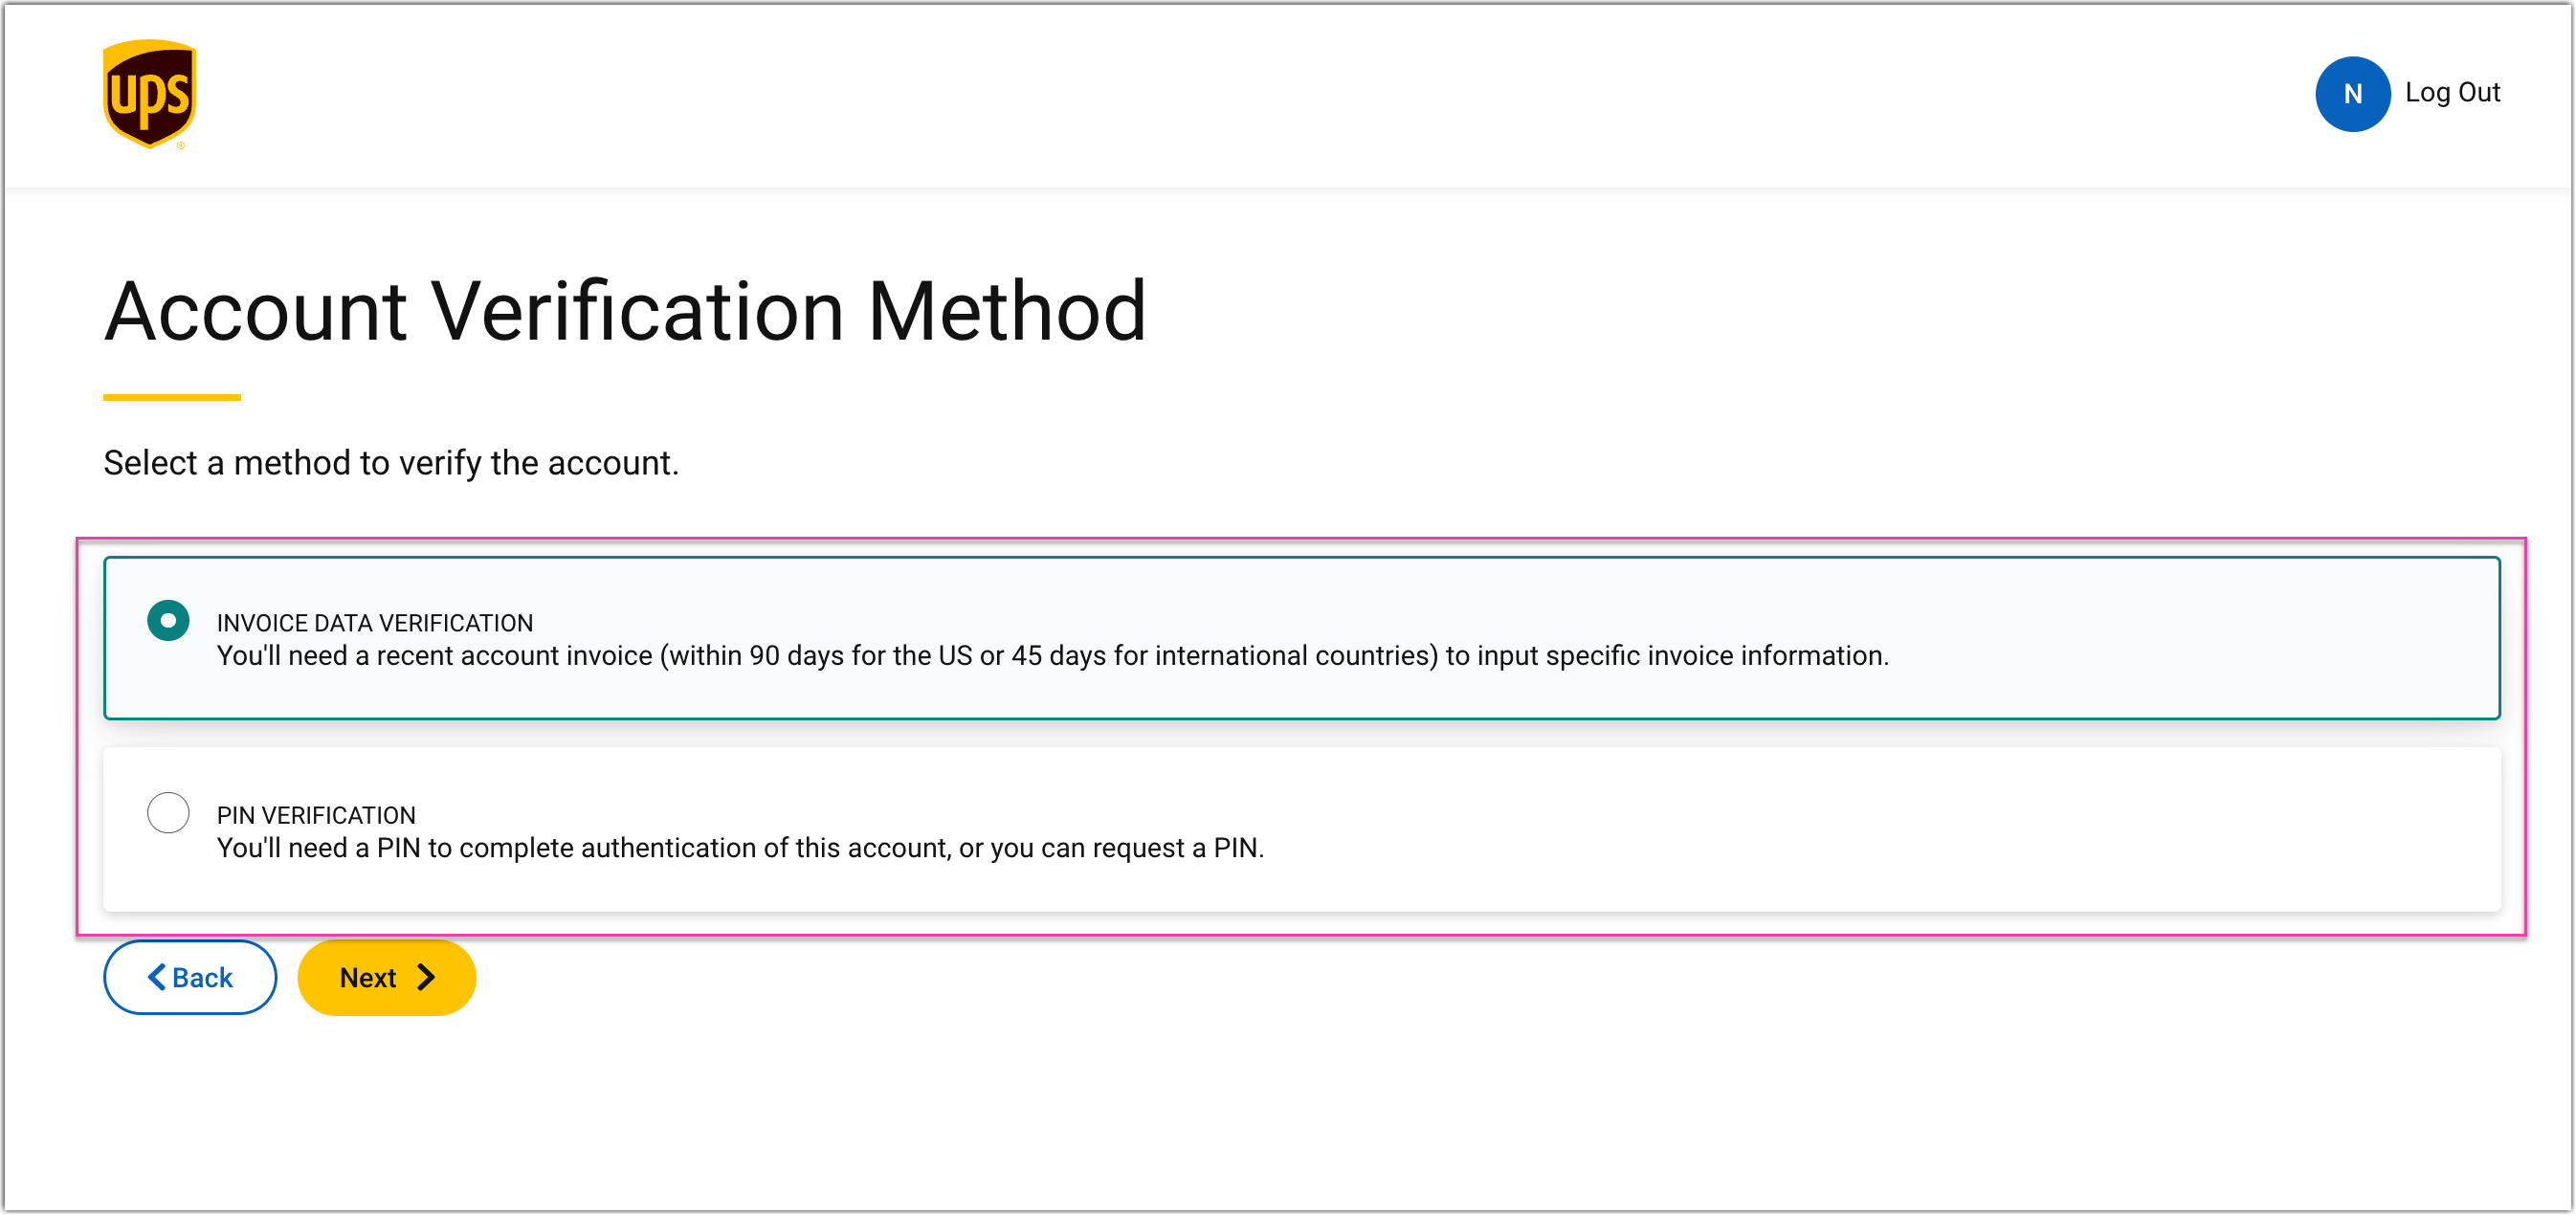
6. Select the INVOICE DATA VERIFICATION or PIN VERIFICATION, and then click the Next button.
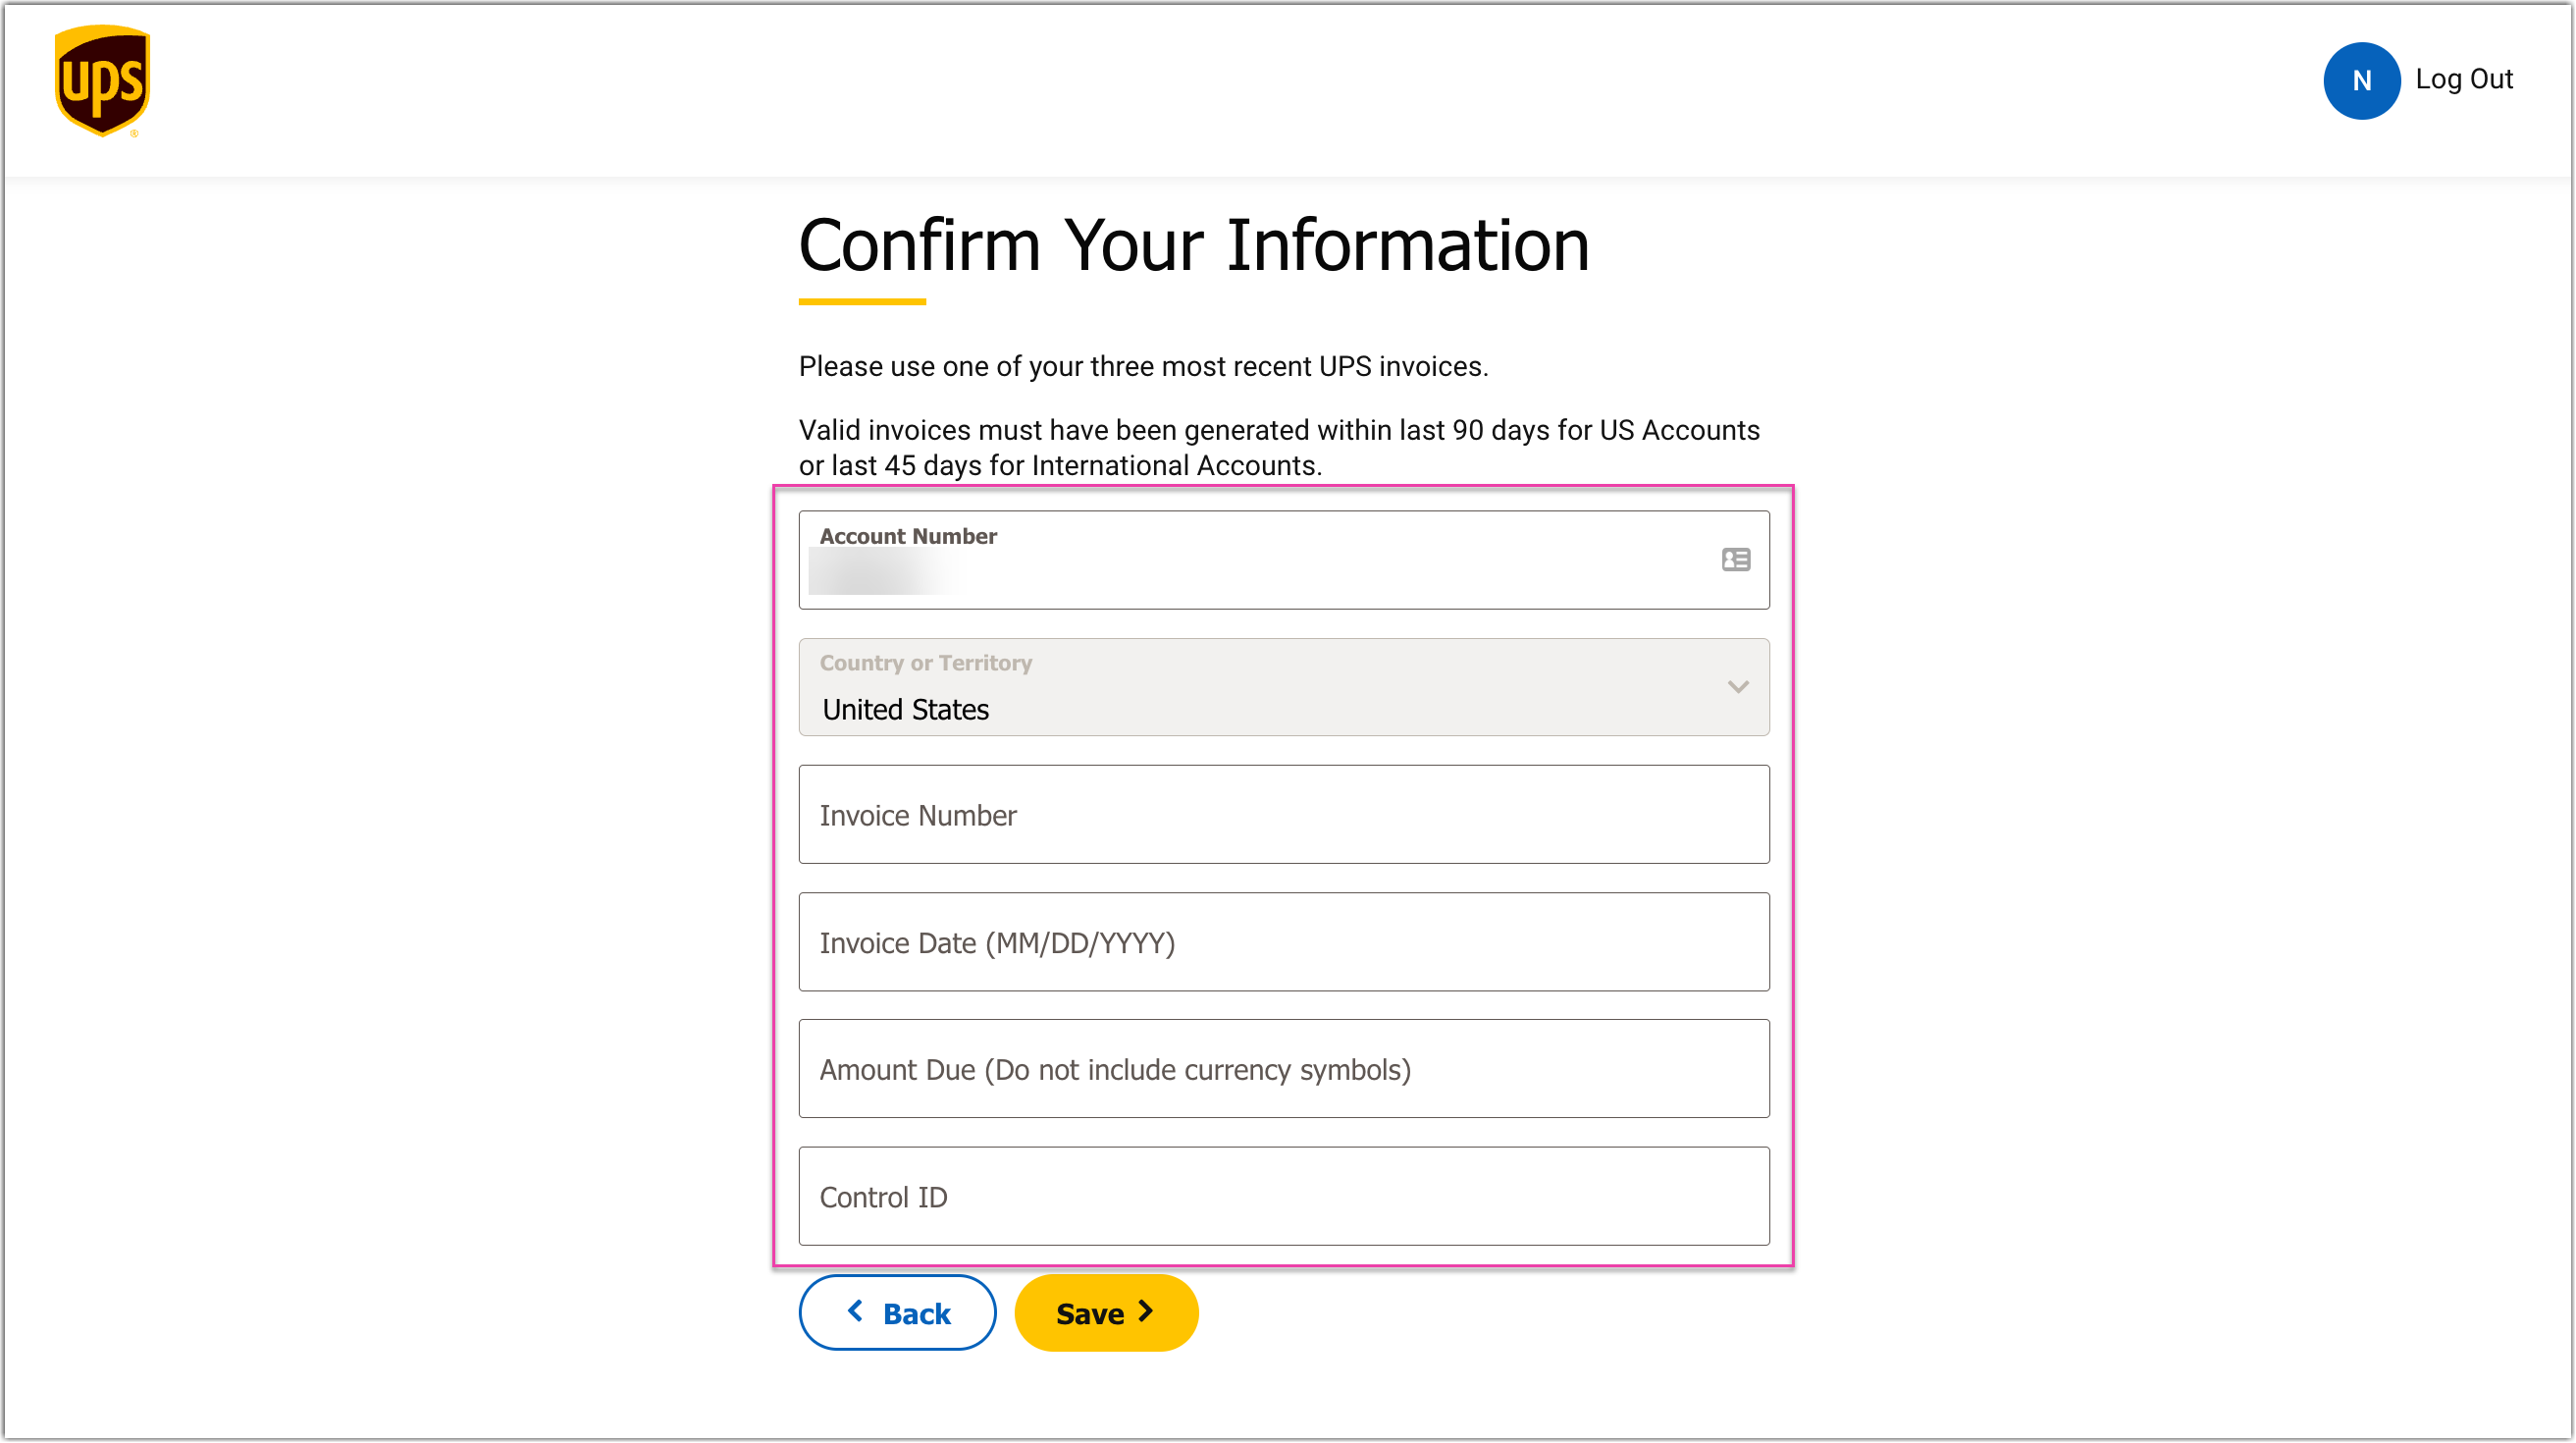
7. Confirm your information, and then click the Save button.
Connecting UPS to Small Parcel Suite
To start shipping orders through UPS, connect your UPS account to Small Parcel Suite at the Settings page based on the information on your latest invoice.
If the details from the recent invoice don’t match the values entered during setup, you’ll encounter an error when trying to connect.
- Login to Extensiv Hub, and then navigate to the Small Parcel at the 3PL Warehouse Manager.
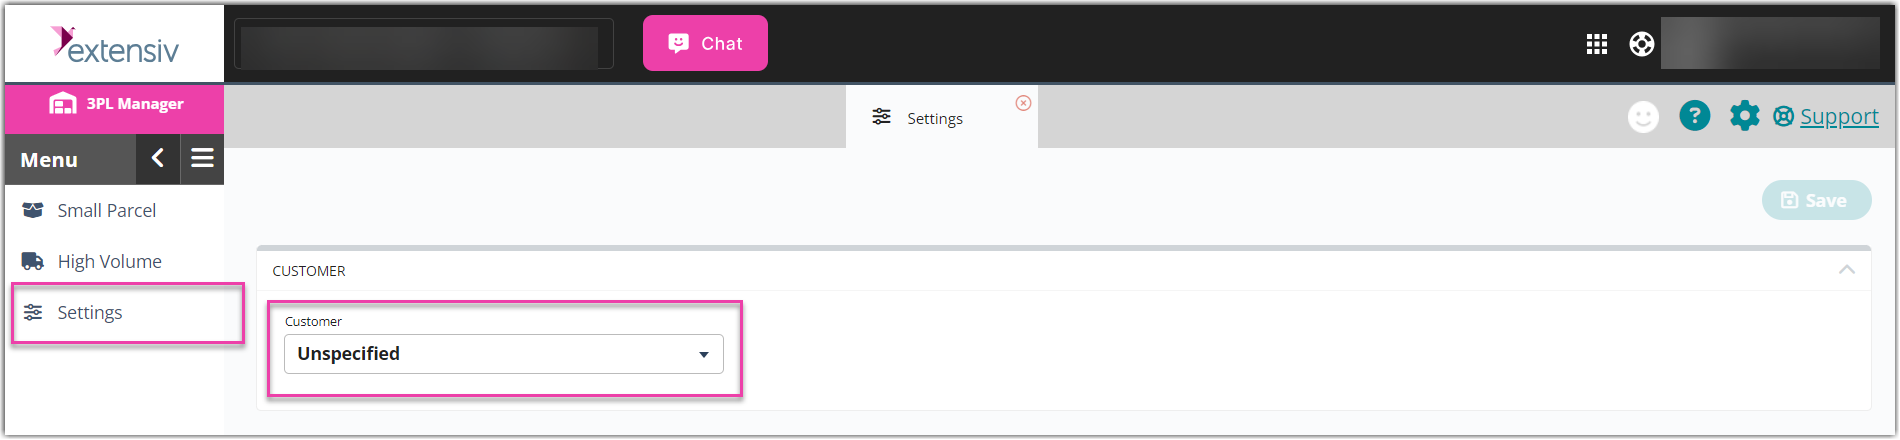
- At the left navigation pane, select the Settings, and then select the desired customer in the Customer dropdown.
Please delete any existing UPS account in the Carrier Accounts section. To delete a Carrer Account, select the row, and then delete it.
- Select the Create button.

- Select details in the following dropdown menus, and then click the Next button
- Connection Type: desired connection
- Warehouse: desired warehouse
- Carrier: United Parcel Service
- Provider: ShipEngine
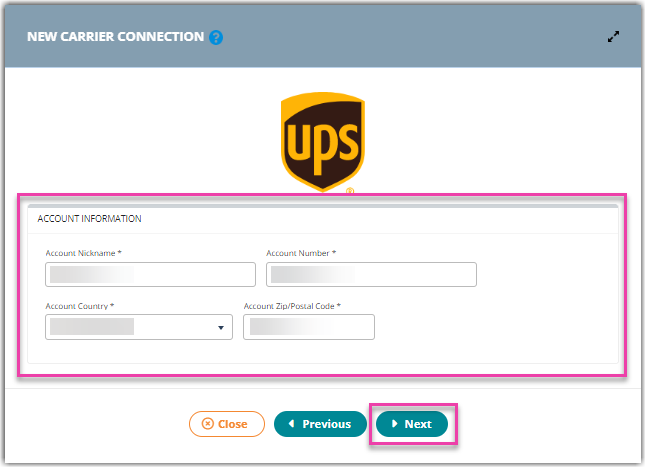
- Input your account information, and then click the Next button.
- Account Nickname
- Account Number
- Account Country
- Account Zip/Postal Code
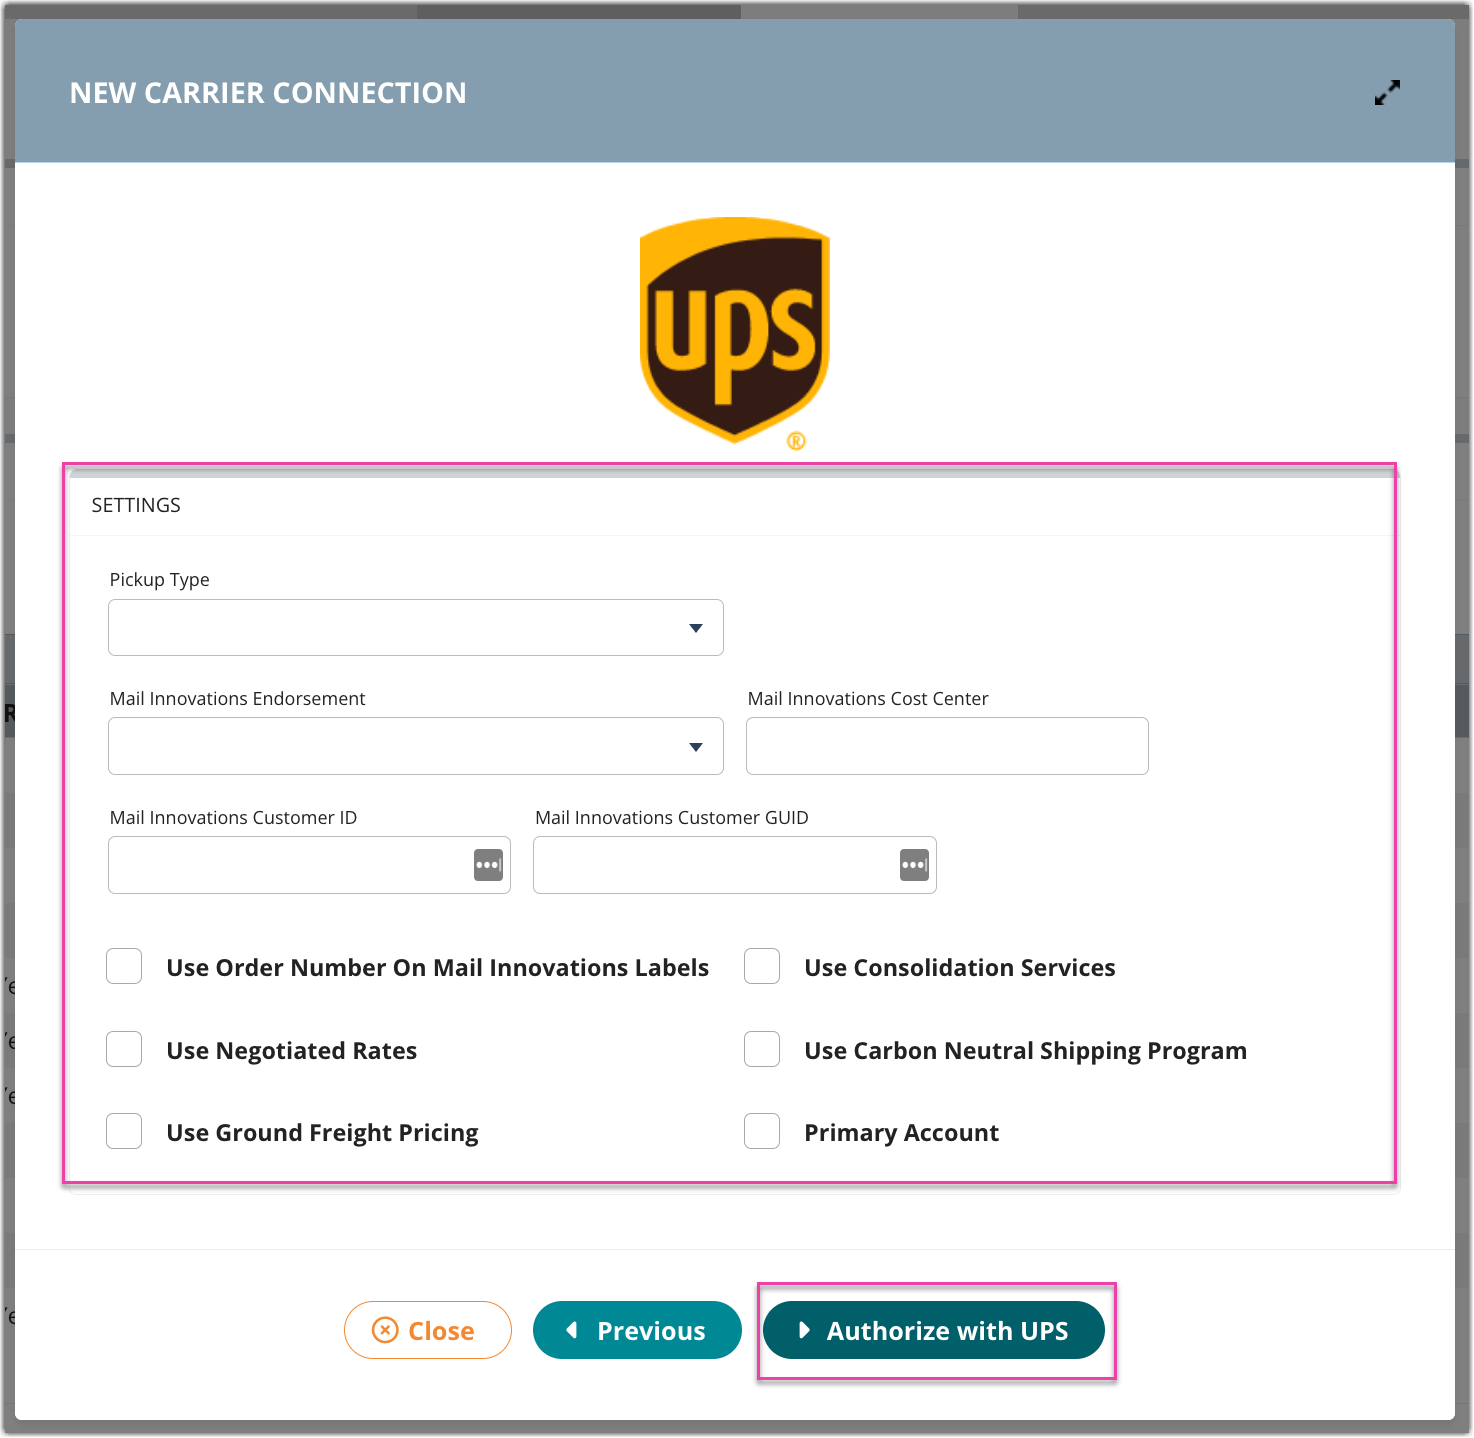
- Input your Settings information, and then click the Authorize with UPS button. In the UPS dialogue, enter your UPS account information.
-
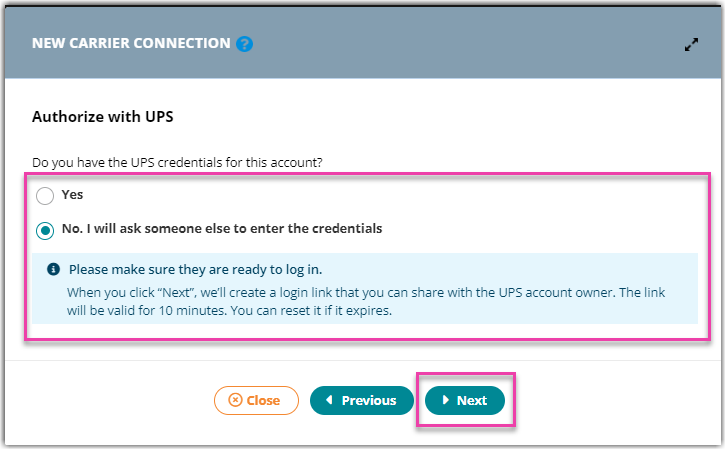
Select Yes if you have existing UPS credentials or select No if you don't have existing UPS Credentials, and then click the Next button.
- If you have existing credentials, follow the steps in the Customers with existing UPS credentials section.
- If you don't have existing credentials, follow the steps in the Customers without existing credentials section.
Customers with Existing UPS Credentials
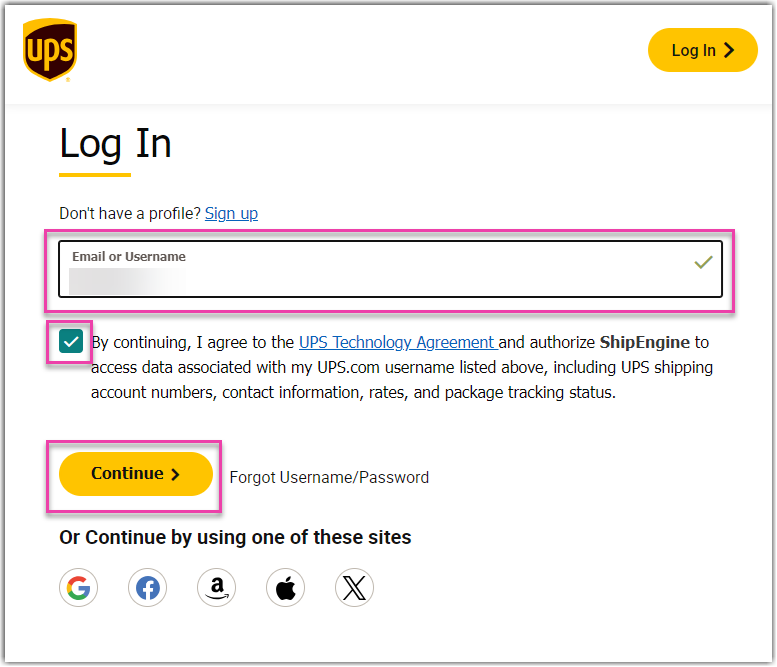
- Click the UPS Technology Agreement checkbox, and then click the Continue button.
- Enter your password, and then click Log In button.

A notification appears when the carrier connection is added successfully.

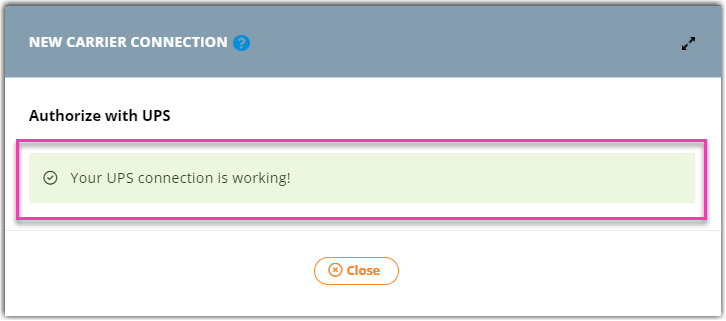
- Click the Check UPS connection button.
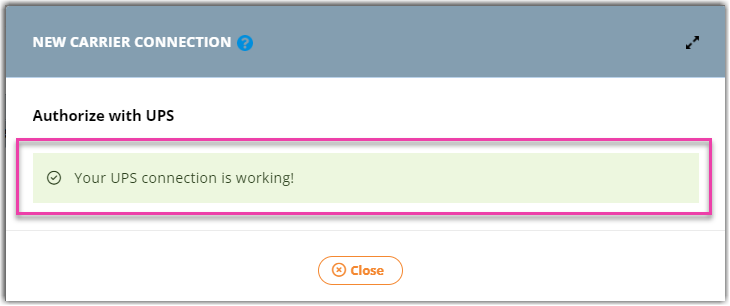
A notification appears when your UPS connection is working.
Customers without Existing UPS Credentials
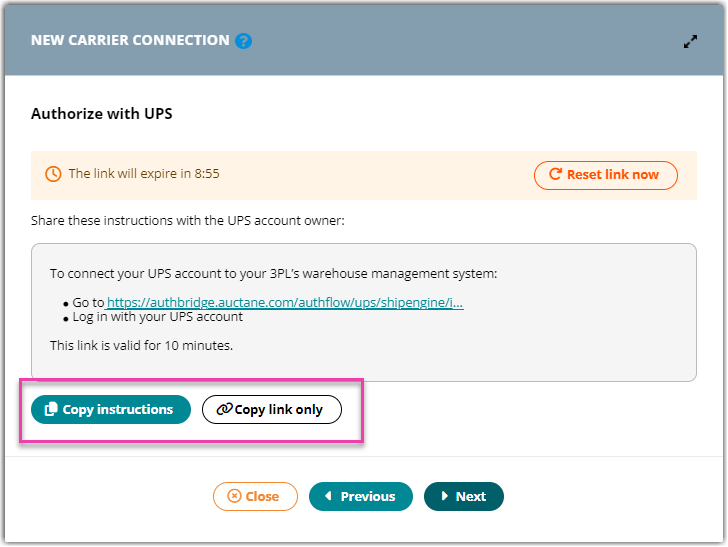
- Click the Copy link only button, and then send the link to your customer to log in to your UPS account.
- You may also click the Copy instructions button, and then send it to your customer.
- Once your UPS account is logged in, click the Next button.
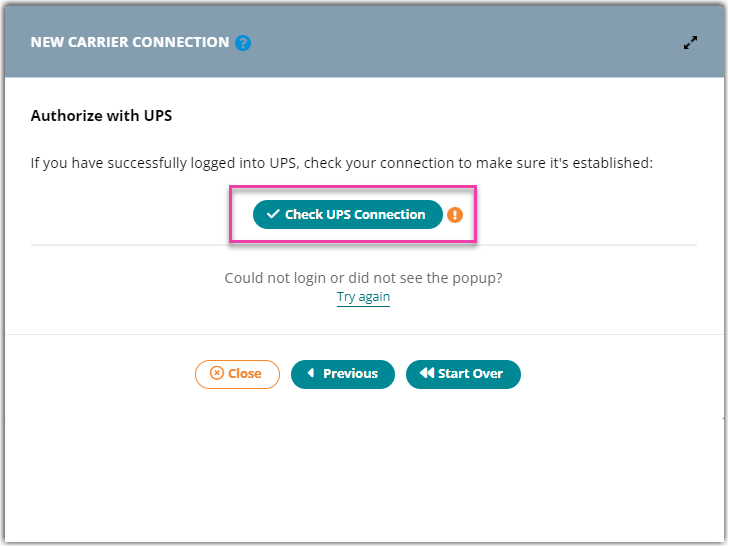
- Click the Check UPS connection button.
A notification appears when your UPS connection is working.
FAQ
What happens if I don’t update my information by August 31?
You won’t be able to connect or process labels or rates through UPS without updating this connection.
Do I need to do this if I have an existing UPS connection?
Yes, every customer with an UPS connection needs to go through this process by deleting their existing connection and reauthenticating by following the new process.
Does this affect what I am charged for my UPS shipments?
No, this change does not affect your rates with UPS. It only changes the authentication process for your UPS connection.
Does this apply to accounts that are billed 3rd party or only accounts used as prepaid?
If you are billing third party, the account that is being billed third party should be unaffected, however the prepaid account that is used as the shipper account will need to be reconnected.
Does this apply or affect the billing of my accounts?
This change only affects the connection to UPS. Billing is unaffected by this update.
Why do I need to ask for my customer’s UPS credentials to set up connections?
Our current workflow requires that you set up connections for your customers this way. We are actively working on a smoother process for your customers’ UPS accounts in the future.
Does this affect my use of the APIs for 3PL Warehouse Manager?
This change only affects the connection to UPS. Other API usage isn’t affected.
Why does ShipEngine need access to my UPS data, username, shipping account numbers, contact information, rates, and package tracking status?
This data is necessary for ShipEngine to connect to UPS. This information is all processed securely through the UPS oAuth 2.0 process.