-
Shipping Operations
- Order Creation
- Order Management
-
Shipping Setups
- Understanding the Parcel API
- Connecting Carriers to Providers
- Understanding Carrier Account Logic
- Configuring Zebra Browser Print
- Configuring Small Parcel Settings
- Using Address Validation
- Connecting Multiple Accounts for the Same Carrier
- Managing Carrier Accounts
- Configuring Fulfillment Invoicing
- Using a Flat File Carrier Integration
- Managing Shipping Carriers
- Configuring a Drop Ship Address
- Managing Ship-to Contacts
- Managing Retailers
- Importing Ship-to Contacts
- Managing Ship Method Mappings
- Managing 3rd-Party-Billing Contacts
- Shipping Hazardous Materials
-
Small Parcel Carriers
- Shipping in Small Parcel Suite
- Shipping with Amazon Buy
- Shipping with APC
- Shipping with Australia Post
- Shipping with Canada Post
- Shipping with Canpar
- Shipping with DHL eCommerce
- Shipping with DHL Express (AU)
- Shipping with DHL Express (US)
- Shipping with ePost Global
- Shipping with FedEx
- Shipping with FirstMile
- Shipping With Flexport
- Shipping with Globegistics
- Shipping with Landmark
- Shipping with OnTrac
- Shipping with PARCLL
- Shipping with Passport
- Shipping with Pitney Bowes Cross-Border Delivery
- Shipping with Pitney Bowes Standard
- Shipping with Purolator
- Shipping with RR Donnelley
- Shipping with SEKO Ecommerce
- Shipping with Sendle
- Shipping with Stallion Express
- Shipping with Tusk Logistics
- Shipping with UPS
- Shipping with USPS (BUKU Ship)
- Shipping with USPS (Endicia)
- Shipping with USPS (Stamps.com)
- Shipping with UPS Mail Innovations®
- Shipping with FedEx One Rate®
- Shipping with USPS (Pitney Bowes Expedited)
- Connecting Small Parcel to UPS
- Packing Basics
-
Order Processing
- Navigating the Small Parcel Homepage
- Packing in the Small Parcel Space
- Shipping in the Small Parcel Space
- Using High Volume Processing (HVP) with SmartParcel
- Printing Return Labels
- Printing Combo Labels
- Voiding Shipping Labels
- Troubleshooting Blank Shipping Labels
- Creating End of Day Requests (Manifesting)
- Billing Best Practices for Shipping
- International Shipping
Consolidating Packages
The Consolidate Packages feature is an automatic method of packing orders in 3PL Warehouse Manager that works best when most of your orders are shipped using the same package type. You must have your package types defined in the system before utilizing this feature—see Managing Packaging for further instructions.
This article reviews how to consolidate packages in 3PL Warehouse Manager.
Please note that using this feature indicates you have already packed each individual order into separate packages. The use of this feature also overwrites any previously defined package data.
- To consolidate packages, navigate to the Small Parcel homepage or Orders > Find Orders in the WMS.
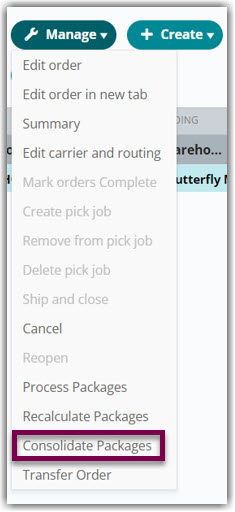
- Select one or more orders to individually consolidate into the selected package type, then click Manage > Consolidate Packages.
- Scan the relevant package barcode; or choose the appropriate package type from the drop-down menu, then click Save.
Once the packages are consolidated, you receive a confirmation message and the new package data is reflected in the grid, as well as all other places in the system where package data appears.
Please note that Consolidating Packages does not populate Pack Done Date in the Find Order grid. That field is only populated by going through the SmartPack process, which you can read about here.