Navigating the Find Orders Page
4.8 min read
|The Orders module, and more specifically the Find Orders page, is one of the most useful and interactive pieces of 3PL Warehouse Manager. In a nutshell, it allows you to create, view, edit, manage, import, and export your orders.
This article reviews the basic components of the Find Orders page.
To access the Find Orders page, you must have the following permission assigned to your user role: Orders Module > Manage Orders > Find Orders.
Find Orders Components
Navigate to Orders > Find Orders in 3PL Warehouse Manager, then continue reading below to learn about each main component of the Find Orders page.
Please note that having multiple tabs or browsers running 3PL Warehouse Manager on the same computer can cause data issues and inconsistencies in the Orders Grid and your search filters.
Search filters
In the left pane on the Find Orders page, you can find various search filters to help you quickly find what you’re looking for in the Find Orders grid.
- You can find the 'Multi-Search' field, which allows you to globally search across Transaction, Reference, and PO numbers.
- You can also find more specific search filters, such as Date Range, Order Details, and Transaction ID.
- Once you find the search filters that work best for you, you can minimize the filters that take up space, as well as drag-and-drop the filter containers to your preference.

- You can easily Refresh the Find Orders grid, Clear your applied search filters, or Save [your customized] View to quickly apply that specific search criteria the next time you access this page. If you make changes to an applied view, click Update to save your changes.
- You can also click the collapse icon
 in the top-right corner to hide the search filters and maximize viewing space for the data grid.
The “Backup Filters” and “Restore Filters” features were removed on April 16, 2026. We identified follow-on issues that could impact system stability, so these features have been removed while we work toward a more stable implementation.
Data grid
In the main pane, you can find the customizable Find Orders grid.
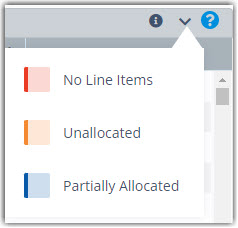
The colored rows indicate an order's allocation status. You can find the legend for the color scheme by hovering over the information icon in the top-right of the grid:
Listed below are a few of its customizing capabilities.
- Wish the grid was sorted differently? You can sort columns to your preference by dragging/dropping them, as well as sort your data by a specific column header, with the click of a button.
Smart User Tip: You can use <Ctrl> + click on the column headers to be able to sort by two or more columns simultaneously.
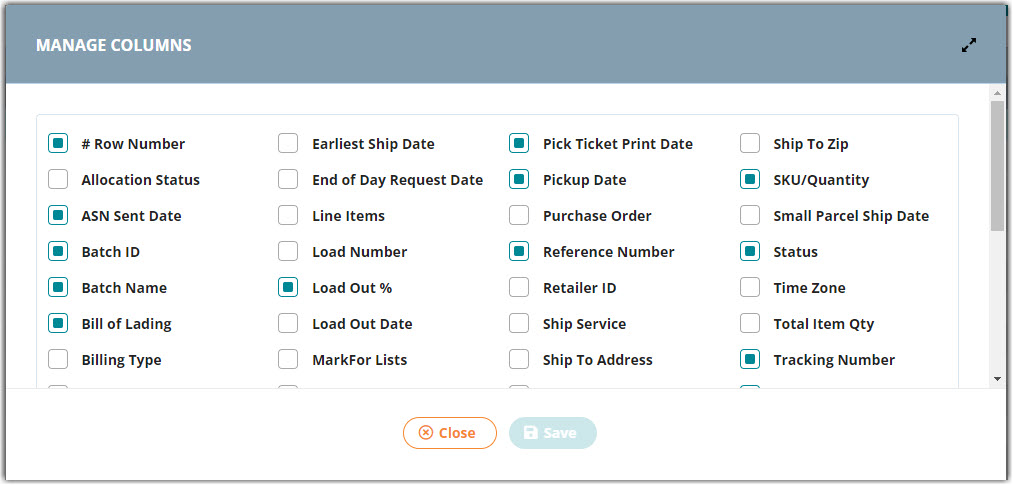
- By selecting Options > Columns, you can select which columns you’d like to display in the grid.
- Need more search filters than what's provided in the left pane? Click the ellipsis next to a column header to filter the data in that column.
There's currently a known issue where if you want to use the “Has no value” column filter, you must apply it last in order to work.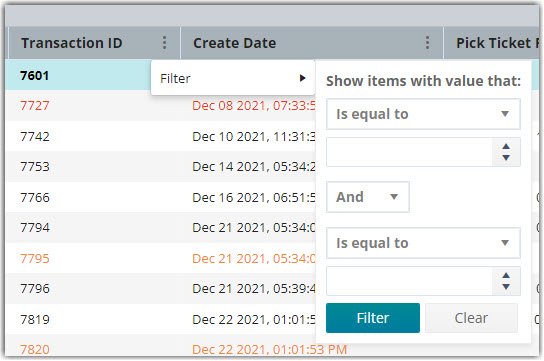
- Want to quickly view general summaries for your orders, such as total volume, weight, packages, and primary units? Click the drop-down arrow in the top-right of the grid to view these summaries for all orders in the grid or a selection of orders.

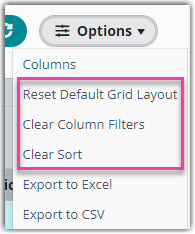
- Just like the ability to save your search filter configurations, you can Save [the] View of your grid customizations from the left pane, as well as revert to the default column data by clicking Options and selecting one of the Reset/Clear options.
- Do you need to use this data elsewhere? You can export all data displayed in the grid to an Excel or CSV file by clicking Options and selecting one of the Export options.
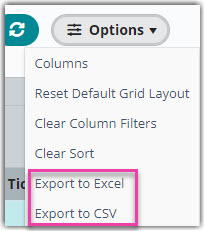
Exporting from our system normally gives a 1-to-1 representation of the data from the grid. However, when numerical values contain leading zeroes or exceed 11 characters, those values automatically convert to scientific notation upon opening the file.
One method of avoiding this in Excel is saving the file, converting it to a .txt file, then importing into Excel. To do this, open a blank worksheet, select the Data tab, then specify to import 'From Text/CSV'. For further guidance on this, please refer to Microsoft's help article here.
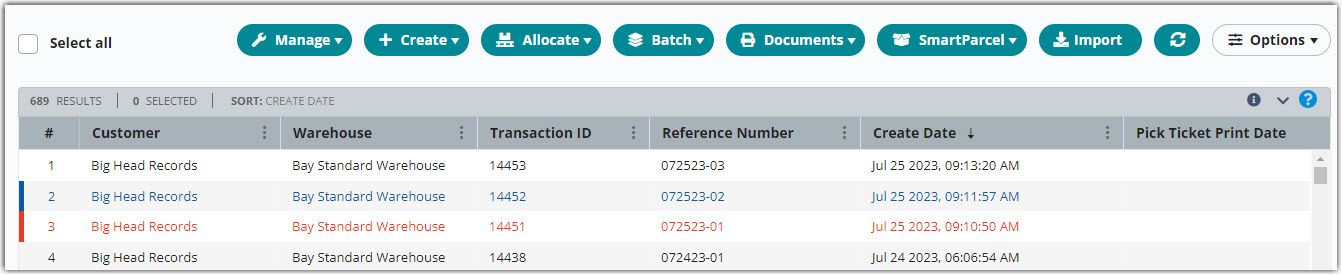
Action options
You also have a variety of options to interact with your orders. Once you select one or more orders from the grid, you can click any of the buttons outlined below.
Smart User Tip: You can also access many of these actions by right-clicking on an order.
The Manage drop-down menu gives you a range of options to manage one or more orders.
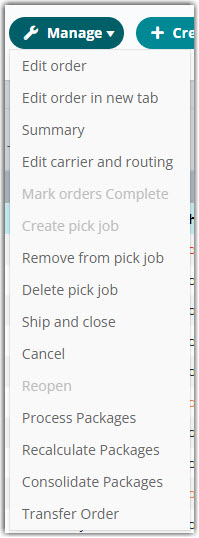
- Edit order: Opens the order for viewing/editing purposes
- Edit order in a new tab: Opens the order in a separate tab for more visibility
- Summary: Displays a general summary of the order
- Edit carrier and routing: Allows you to edit carrier and routing information for the order(s)
- Mark orders complete: Assigns an Open order the Complete status to indicate that it is ready for processing
- Create pick job: Creates a pick job to complete within SmartScan—see Creating Pick Jobs for more information
- Remove from pick job: Removes the order from an existing pick job, if the job has not already begun
- Delete pick job: Deletes the order from an existing pick job, if the job has not already begun
- Ship and close: Marks the order as shipped and closes it for updates
- Cancel: Cancels an order and removes inventory allocations—note that Customer Users can only cancel open orders
- Reopen: Reopens a closed order
- Send to TMW: Allows TMW Systems users to send the order information to TMW TruckMate if order is marked as complete
- Process Packages: Allows you to view how the order has been packed, as well as consolidate or reset packages—see Processing Packages for more information
- Recalculate Packages: Allows you to pack all order contents based on the packaging configuration in the item setup—see Recalculating Packages for more information
- Consolidate Packages: Allows you to pack all order contents into the selected package type—see Consolidating Packages for more information
- Transfer Orders: Allows you to perform an order transfer from one warehouse to another under the same customer
If an option is disabled, you can hover over the option to populate a message at the top of the page that explains why it is unavailable for selection.
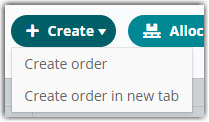
The Create drop-down menu allows you to create an order on the Find Orders page or in a new tab. For more information on order creation, please see Creating Orders.
The Allocate drop-down menu allows you to manage inventory allocation for one or more orders. For more information on allocation, please see Understanding Allocation Logic.
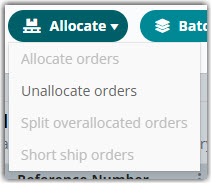
- Allocate orders: If one or more of the selected orders contain unallocated line items, this selection allocates inventory to those line items.
- Unallocate orders: If one or more of the selected orders contain allocated line items, this selection unallocates inventory from those line items.
- Split overallocated orders: If one or more of the selected orders contain overallocated line items, this selection creates a new open order and back-orders those line items so that you can ship what's available in the selected order.
-
Short ship orders: If one or more of the selected orders contain overallocated line items, this selection cancels the overallocated inventory and removes the line items from the order.
- Once you short ship an order, you can print a Short ship pick ticket and packing slip from the Documents menu to view the original order quantity and actual shipped quantity.
- Note this feature is only available if you have Short Ship enabled for your account under Admin > Settings.
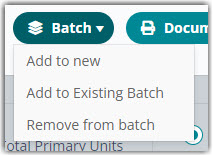
The Batch drop-down menu allows you to add orders to new or existing batches, as well as remove orders from their current batches. For more information on batching, please see Batch Order Processing.
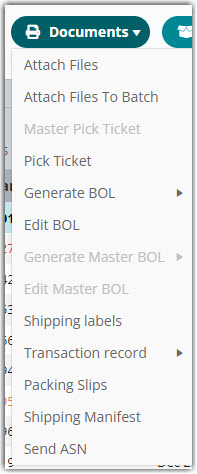
The Documents drop-down menu allows you to attach file(s) to an order, generate various documentation, or send an Advanced Shipping Notice (ASN) for orders that have a pre-wired integration. For more information on these documentation options, please see Generating Order Documents.
The Import button allows you to quickly upload a spreadsheet or file to import orders into the system. For more information on order imports, please see Importing Orders.