Processing Packages
1.8 min read
|The Process Packages feature allows you to manually indicate your package contents in 3PL Warehouse Manager for individual orders. This method works best if your package contents vary from order to order and you do not have SmartPack enabled for your account.
This article reviews how to pack an order using the Process Packages feature from the Find Orders page.
If you need to view the package contents after you've processed packages for an order, you can do so through the View Transaction Report with the 'Show packages' option enabled.
Guidelines
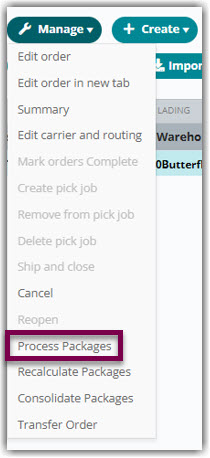
To pack orders using Process Packages, navigate to Orders > Find Orders, select an order to pack, then click Manage > Process Packages.

A new tab titled 'Update/Edit UPS Packages' opens in 3PL Warehouse Manager that displays two grids. The top Package Summary by SKU grid groups packages that contain the same SKUs and package dimensions, while the bottom Package Detail grid displays all packages on the order.
You can filter the Package Detail grid with the following options:
- Show None: When selected, this hides all packages on the order
- Show All: When selected, this displays all packages on the order
- Filtered By: When selected, this displays packages that match the 'ID' values entered

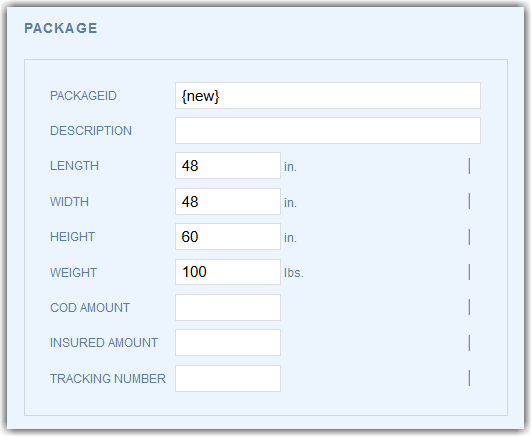
To add a package, click Add, then fill out the relevant fields under Package. Each field is further outlined below.

- PackageID: Represents a unique identifier that the system automatically populates once saved
- Description: Used to quickly reference the package details in the Process Packages grid
- Dimensions fields: Carriers require these fields to be complete and accurate for the system to reference when generating shipping labels
- COD Amount: Specifies payment amount for carrier if using 'collect on delivery'
- Insured Amount: Specifies the dollar amount for which the package is covered by insurance
- Tracking Number: The tracking number associated with the individual package—this value is not tied to the Tracking Number field on the 'Carrier and Routing' section of an order
Once you fill out the appropriate fields, select a 'SKU' from the drop-down menu under the 'Content' grid. Enter the 'Qty' of the item, then click Add.
Repeat for each SKU in the package, then click Save. This returns you to the Process Packages page, in which the newly added package displays in the Package Summary by SKU grid.
Aside from adding new packages, you can also complete the following tasks from this page:
- Edit a processed package. Select the package from the Package Detail grid, click Edit, make your changes, then click Save.
- Delete a processed package. Select the package from the Package Detail grid, then click Delete.
- Consolidate two or more processed packages into one packaging unit. Use < Ctrl > or < Shift > on your keyboard to multi-select the relevant packages in the Package Detail grid, then click Consolidate. This allows you to enter data for a new package with the contents of the consolidated packages. Once entered, click Save.
- Delete all packages on the order and have them regenerate based on the package data captured on the item-level setup. Click Reset.
- Generate files for a flat file carrier integration. Click Export. For more information, please see Using a Flat File Carrier Integration.
- Generate EDI labels. Click Print Labels. For more information, please see Printing UCC Labels.
