Configuring Zebra Browser Print
2.9 min read
|Zebra Browser Print allows you to print directly to a Zebra ZPL printer, which is used in 3PL Warehouse Manager for printing labels in Small Parcel Suite and SmartScan. Please note that Browser Print supports Google Chrome, Mozilla Firefox, and Safari, but Microsoft Edge is not explicitly supported.
This article reviews the installation and configuration of Browser Print on a Windows computer and demonstrates the use of Browser Print with SmartParcel.
If you require instructions for an operating system other than Windows, please refer to Zebra's Browser Print User Guide and download the appropriate software version.
Step 1: Set your Zebra printer as default
Before you install Browser Print, you must first set your Zebra printer as your default printer.
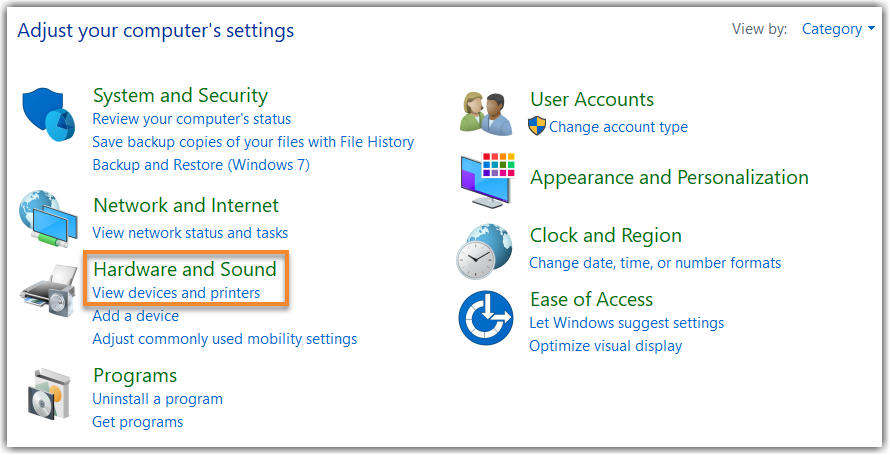
- Navigate to your computer’s Control Panel.
- Under 'Hardware and Sound', click View devices and printers.

- Under 'Printers', right-click your Zebra printer, then select Set as default printer.
Step 2: Install Zebra Browser Print
Once you set your Zebra printer as default on your computer, it's time to install the Browser Print software.
- Download the Browser Print software.
- After the software is finished downloading, open the file to run Browser Print.
- Follow the on-screen prompts to complete the installation.
- Once installed, read the End User License Agreement, then click I Agree.
- A dialog box may appear to inform you that you must accept the security certificate in your browser to enable https communication. Click OK.

Depending on your browser, you may be presented with a warning sign about this site not being safe. This warning appears when security certificates are self-signed. For these purposes, Zebra includes a self-signed certificate in their Browser Print utility. This certificate is used to facilitate communication between a web-based application, such as 3PL Warehouse Manager, and the Browser Print service that has been installed on your local machine (localhost).
If the pop-up appears informing you that the site contains a security risks, click Advanced, then select the option to continue to the site—wording varies among browsers.
If the pop-up does not appear, direct your browser to this link manually, then select the options to proceed to the site.
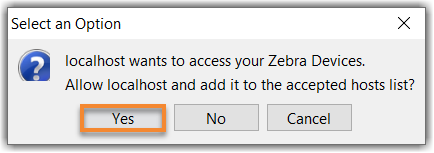
Browser Print then asks for permission to access your system's printer. You must select Yes to provide access. Once you provide access, it is added to the list of accepted hosts in Browser Print.

If the installation is successful, the webpage informs you that "SSL Certificate has been accepted. Retry connection." You should then restart your browser.
Step 3: Configure your Browser Print settings
Once you install Browser Print, you need to configure the program’s settings.
In your desktop taskbar, right-click the Zebra icon, then select Settings.
This opens the Browser Print Settings, in which the following options are available:
- Default Devices: Lists your default device set, which is different than the default printer set by the operating system. This can be changed once set via the Change button or via script.
- Accepted Hosts: Lists web addresses that you have allowed access to your device. These can be removed using this screen.
- Blocked Hosts: Lists web addresses that you have blocked access to your device. These can be removed using this screen.
- Broadcast Search: Selection box that allows Zebra Browser Print to find and print on network-connected Zebra Printers.
- Driver Search: Not supported in this release.
If using a network-shared printer, click the selection box next to Broadcast Search to allow for the network connection between your Zebra printer and Browser Print.
If your Zebra printer is not listed under 'Default Devices', click Change. The Select Default Device dialog box opens, in which all discoverable devices appear. Using the drop-down menus, select the relevant Device Type and Device for your Zebra printer, then click Set.
Step 4: Print a shipping label and allow system access
Before you can print labels, you must grant 3PL Warehouse Manager access to Browser Print.
- To get started, navigate to the Small Parcel space in 3PL Warehouse Manager.

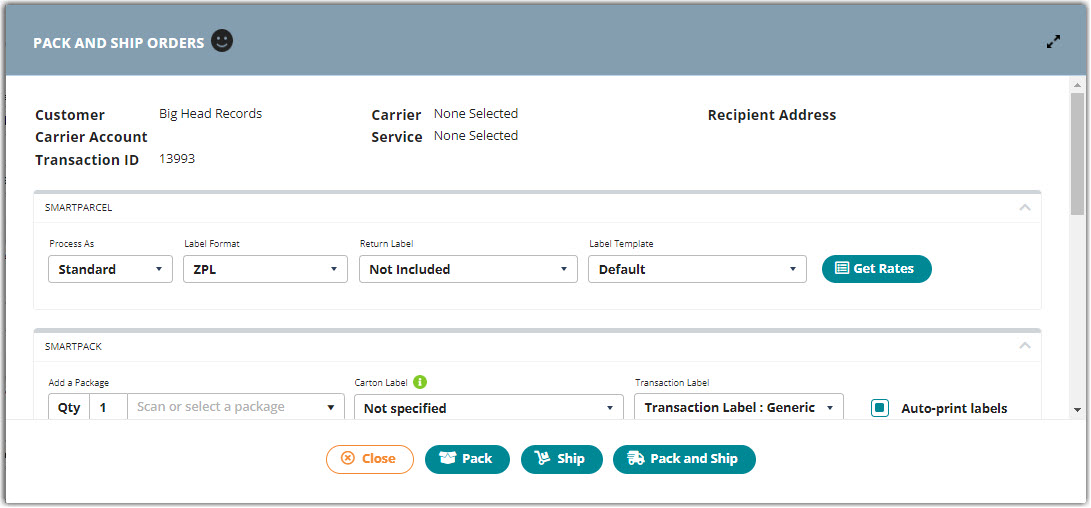
- Select an order from the Small Parcel grid, then click Pack and Ship.
- Select Standard for 'Process As', ZPL for the 'Label Format', then click Ship (or Pack and Ship if you've already packed the order).

- 3PL Warehouse Manager then asks for permission to access your system's printer. You must select Yes to give our application access and add 3PL Warehouse Manager to the list of accepted hosts in Browser Print.
- Once you add 3PL Warehouse Manager as an accepted host, you can print small parcel shipping labels with your Zebra printer using SmartParcel.
- For more detailed instructions on using SmartParcel, please see Shipping in the Small Parcel Space.
- If you also plan to print movable unit (MU) labels using SmartScan, see our guidelines for Printing MU Labels in SmartScan for next steps.
You cannot print from 3PL Warehouse Manager if you do not allow access to your printer. If the dialog box does not appear, uninstall Browser Print, restart your computer, then repeat these steps to reinstall and reconfigure Browser Print. Please contact Technical Support if the problem persists.
