Add New User with Order Manager Permissions
3.2 min read
|Step 1 - Create a user account in Extensiv Hub
Only the owner or a user with the "create users" permission can create new accounts in Hub. To add another user to your account, follow the instructions below.
- Log in to Extensiv.
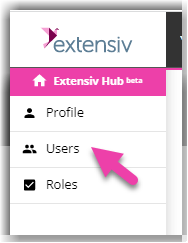
- Click Users on the left navigation menu.
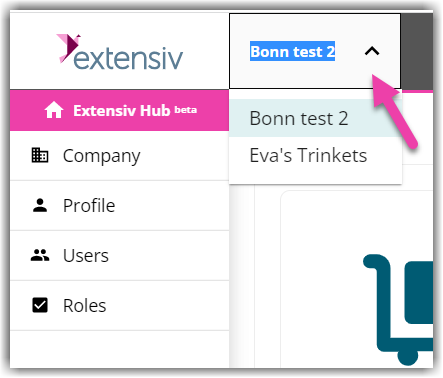
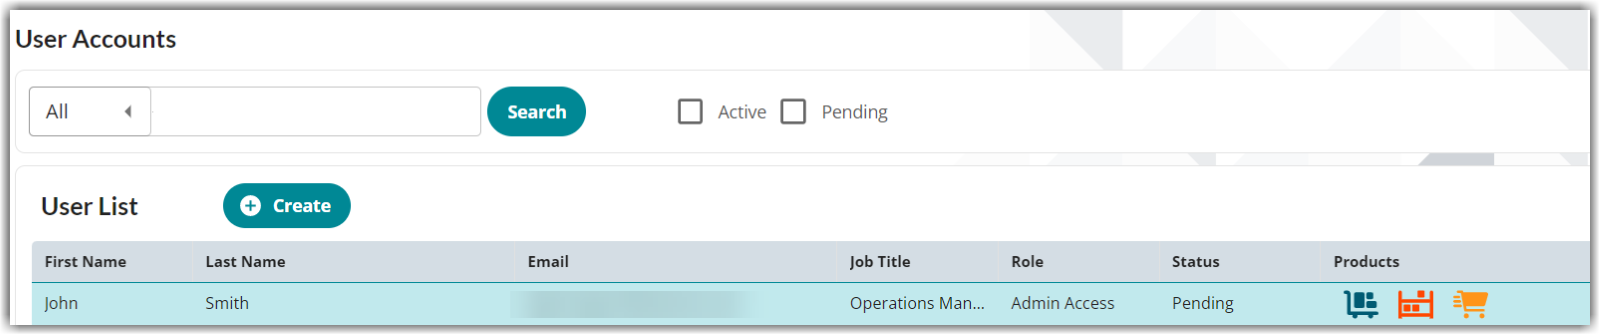
If you have multiple organizations in Hub, make sure to select first the organization you want to add the new user to. See below image for guidance.
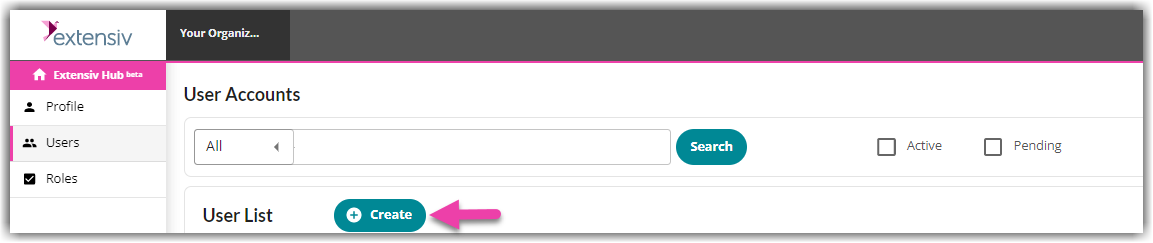
- Click Create. This action will open the Invite Users window.
-
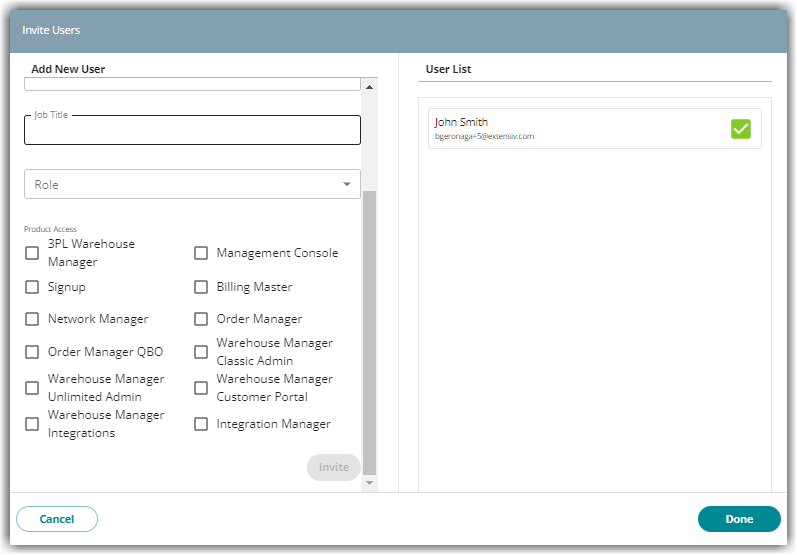
Fill in the new user details. Enter the first name, last name, email, and job title.
-
Select the appropriate role for this account.
The user role defines the permissions of the access in Extensiv Hub. The permissions assigned to this role do not necessarily relate to the permissions they need to have for each product. You still need to manage the product permissions on the product itself.
If you want to learn how to create user roles, see our article on Creating User Roles in Hub.
-
Select Order Manager from the list of product access.
-
Review and confirm the details are accurate. Then, click Invite. You should see the recently created account added to the User List column. Click Done if you’re finished creating user accounts.
If you have 2 or more organizations, and the user also needs to be part of that org, make sure to create an account for that organization too. To do this, just open the organization menu next to the Extensiv logo, select the appropriate organization and follow Steps 1-7.
-
On the User Accounts page, you will find the status of the account as Pending. Inform the user that they will receive an email to join Extensiv Hub.
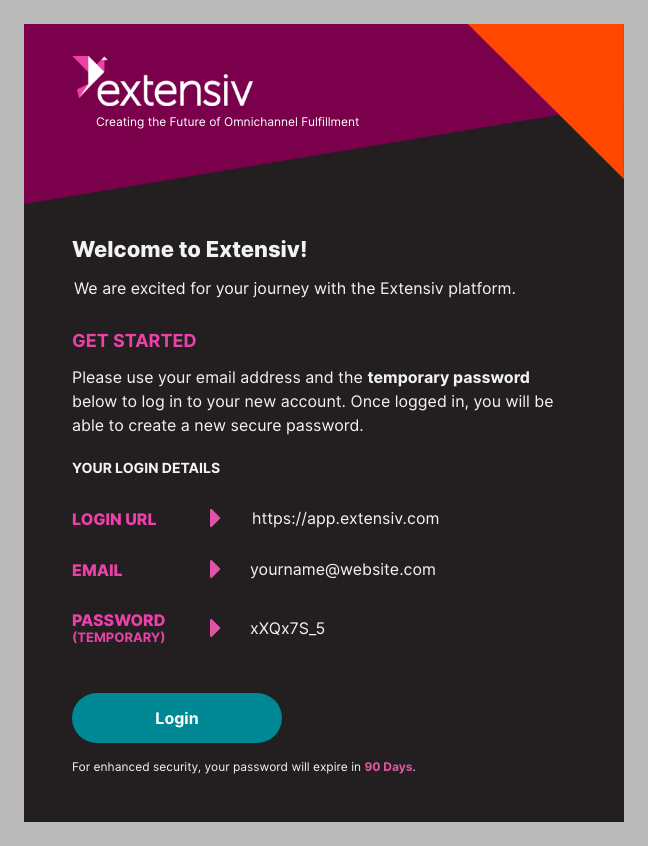
For steps on how to log in to Extensiv Hub for the first time, see this article Logging in to Extensiv Hub for the First Time.
Step 2 - Manager user permissions in Order Manager
After creating the account in Extensiv, you still need to manage the user permission in Order Manager.
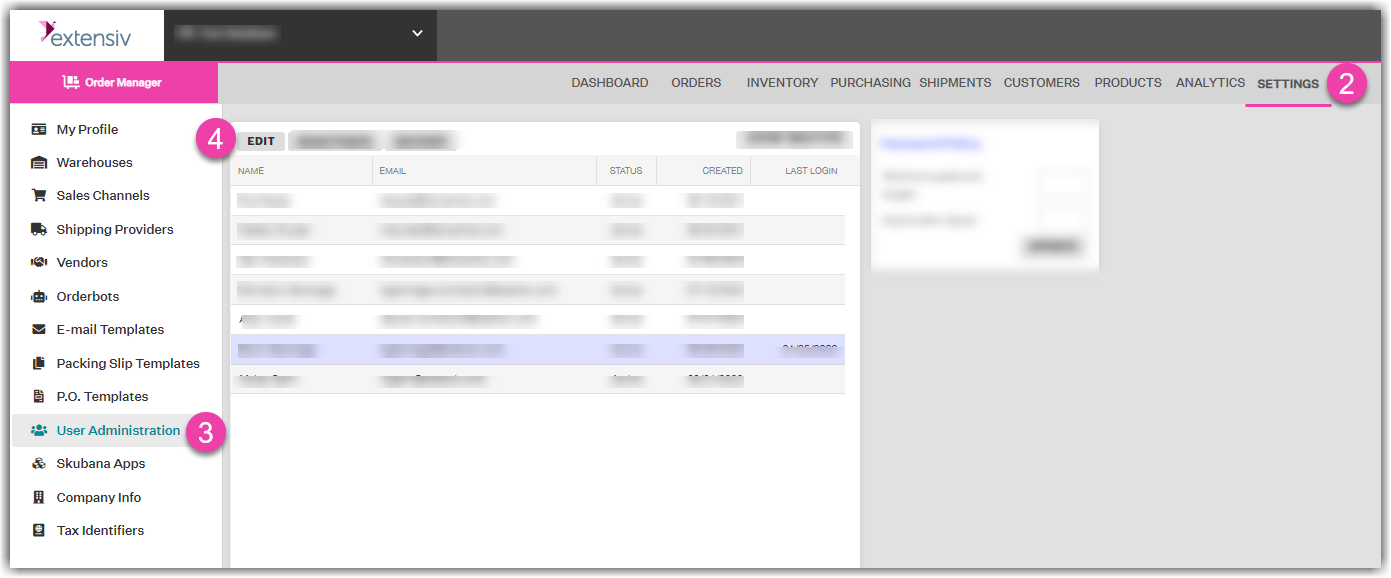
- Select the correct organization and launch Order Manager from Extensiv Hub.
- In Order Manager, click Settings on the top navigation menu.
- Click User Administration.
- Select which account to update the permissions. Then, click Edit.
5. Assign specific permissions for this user. To assign Access Permissions, scroll through the list and check the box in the Allow?column for permissions you wish to grant the new user. 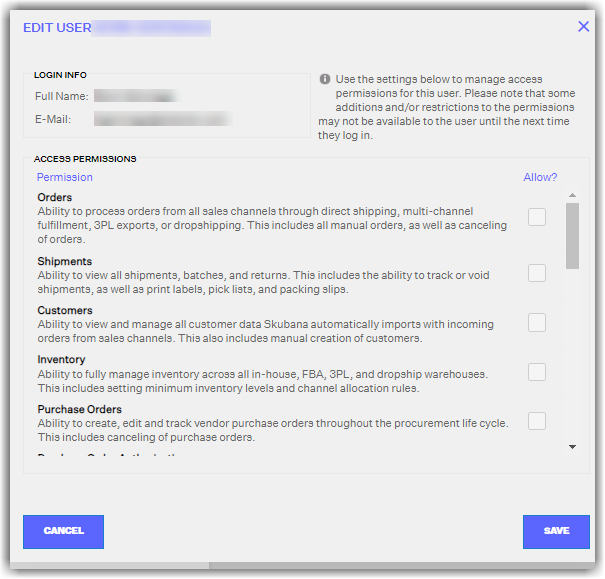
Specific Permissions
The list of assignable permissions and what they allow access to is provided below.
Orders: Ability to process orders from all sales channels through direct shipping, multi-channel fulfillment, 3PL exports, or drop shipping. This includes all manual orders, as well as canceling of orders.
Shipments: Ability to view all shipments, batches, and returns. This includes the ability to track or void shipments, as well as print labels, pick lists, and packing slips.
Customers: Ability to view and manage all customer data Order Manager automatically imports with incoming orders from sales channels. This also includes manual creation of customers.
Inventory: Ability to fully manage inventory across all in-house, FBA, 3PL, and dropship warehouses. This includes setting minimum inventory levels and channel allocation rules.
Purchase Orders: Ability to create, edit, and track vendor purchase orders throughout the procurement life cycle. This includes the canceling of purchase orders.
Purchase Order Authorization: Ability to approve and authorize newly created purchase orders. Users with this permission effectively issue purchase orders.
Products: Ability to manage your core products, kits, bundles, and variations. This includes the creation and editing of basic product info, image gallery, listing SKUs, vendor products, and customs.
Analytics: Ability to run and view all reporting and analysis, including ad hoc, business intelligence, and forecasting reports. This includes auto-generation and e-mailing of reports.
Warehouses: Ability to create and modify in-house warehouses and 3PLs from which your company fulfills orders, including document print settings (in-house warehouses) and FTP settings (3PLs).
Sales Channels: Ability to create and modify the sales channels on which your company sells. This includes channel connection, general settings, and requested shipment service mappings.
Shipping Providers: Ability to create and modify shipping providers used for address verification, rate calculation, and printing of shipping labels for orders fulfilled from direct/in-house warehouses.
Templates: Ability to create and modify all of your templates, including shipment e-mail notifications, packing slips, and purchase order templates.
Vendors: Ability to create and modify vendors that supply and/or manufacture the products your company sells. This includes the ability to configure dropshipping capabilities for eligible vendors.
Orderbots: Ability to create and modify orderbots used for filtering and workflow automation of customer orders from marketplaces and shopping carts.
Order Manager Apps: Ability to install and uninstall apps from the Order Manager App Store.
User Administration: Ability to modify users' permissions. This permission should be given to administrators only.
Billing & Invoices: Ability to enter and edit billing information, as well as view Order Manager invoices of your monthly order totals. This permission should be given to administrators only.
Inventory Reconciliation: Ability to use the individual inventory reconciliation feature found in the Inventory Module. This feature relates to data used in Analytics reports.
Bulk Inventory Reconciliation: Ability to use the bulk inventory reconciliation feature found in the Inventory Module.
You can always come back and edit user permissions at any time by selecting a user and clicking the Edit at the top of the User Administration window, so long as you personally have permission to access this tab.
If you ever need to completely cut off a user's access to Order Manager, you can remove the product access from Extensiv Hub.

Extensiv University