Creating a Package Materials Fee and Small Parcel Shipping Label Fee
2.0 min read
|This article is about the Billing Manager app, not the Billing Wizard in 3PL Warehouse Manager. To learn about the Billing Wizard, please refer to the articles in the Billing Setup.
This article offers a step-by-step guide on how to set up a package material fee in the Small Parcel space for the pack and ship process, using the Manage Packages option within 3PL Warehouse Manager. Subsequently, it explains how to bring the fee into Billing Manager, along with the corresponding shipping charge, for the label that was produced. You can also watch the instructional video for guidance.
Creating the Package/Material Rate in the Billing Manager
- Navigate to Rates > Rate List.

- Click + Create Rate in the upper right corner.

- Select Packing Materials fee.

- Click Continue.
- Provide basic details such as Rate Name, Rate Description, and Charge Label.
- Select Materials for the Charge Category. Then, click Continue.

- Click Yes, Save to save this rate.
- (Optional) Add to a rate sheet. You can skip if not needed.
Assigning the rate to a customer
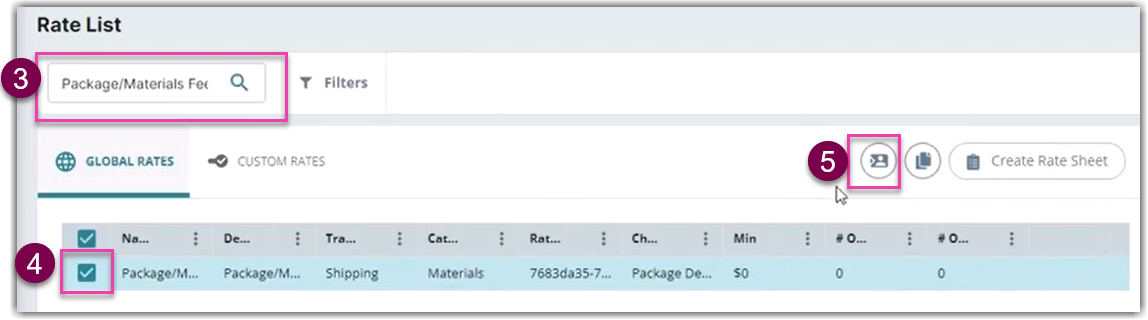
- Navigate to Rates > Rate List.
- Search for the rate name in the search function.
- Select the rate by clicking the checkbox.
- Assign this rate by clicking the icon “Assign rate to a customer” as shown in the below image.
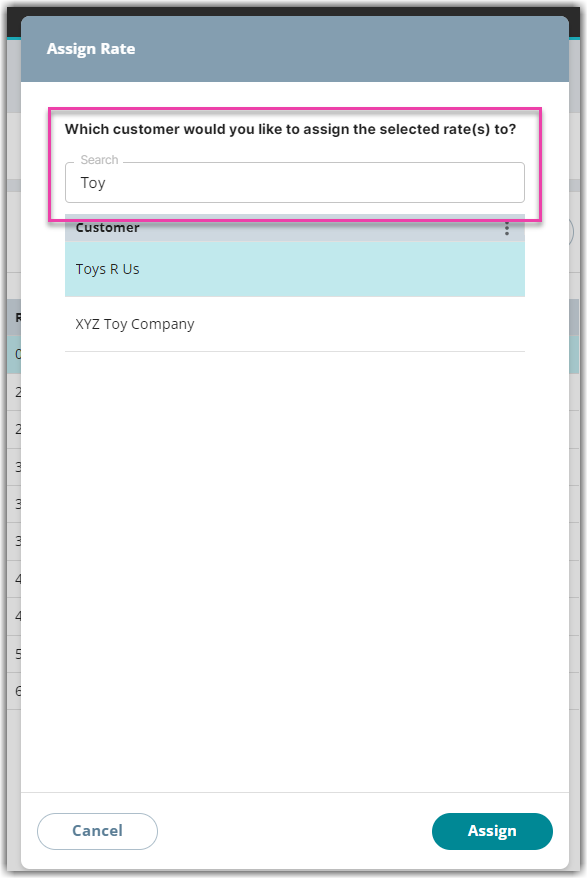
- Select the Global Rate option in the window ‘How would you like to assign this rate?’
- Search for the customer name you want to assign this rate to. Then, click Assign.
Manage package in 3PL Warehouse Manager
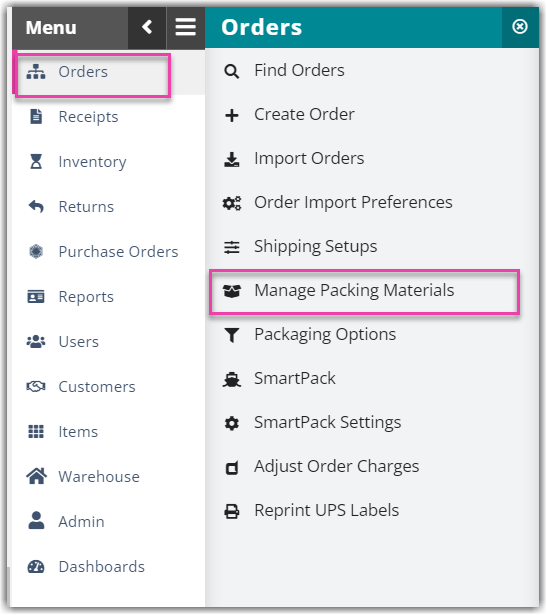
- Launch 3PL Warehouse Manager.
- Navigate to Orders > Manage Packaging Materials.
- Search for the customer and choose the package type from the list. Then, click Edit.
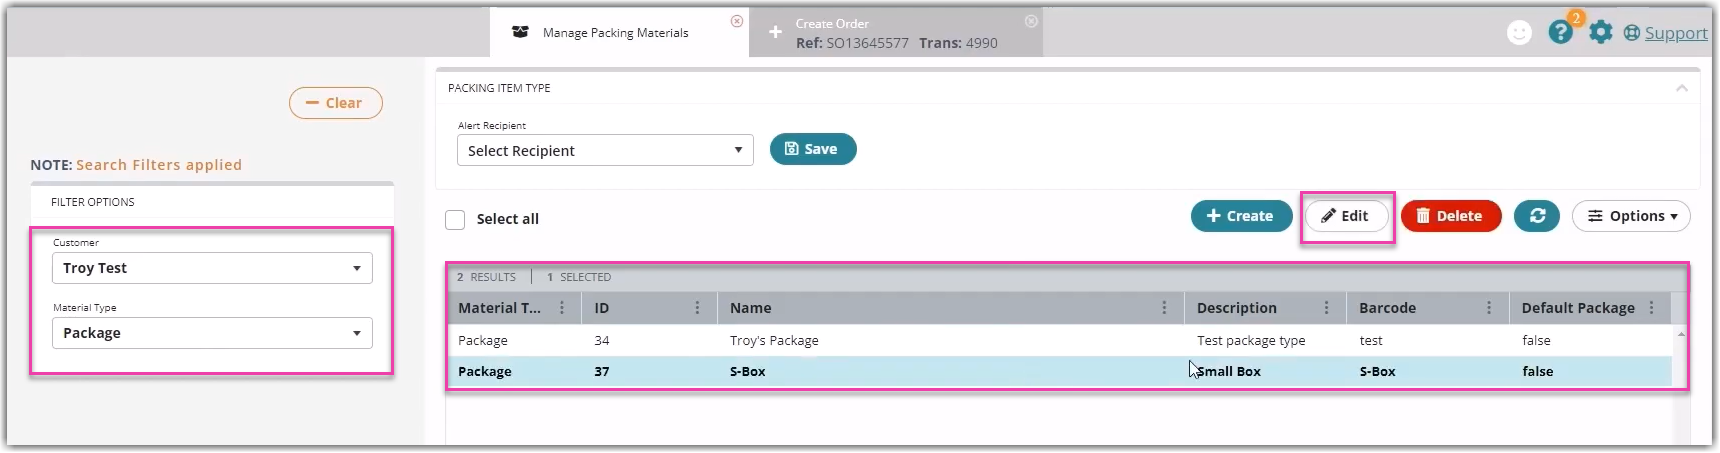
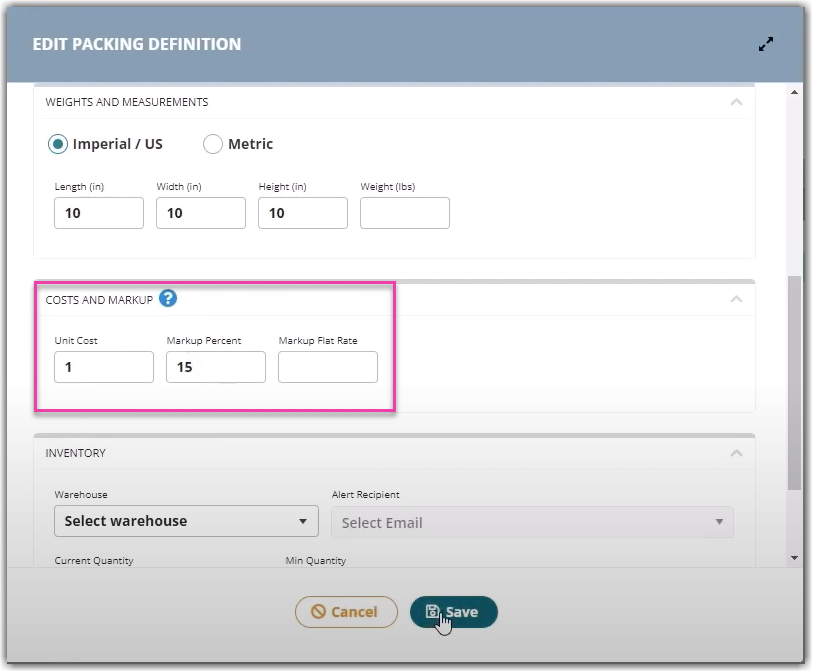
- Scroll down to the Costs and Markup section in the Edit Packing Definition window
- Specify the Unit Cost ($) and Markup Percent (%) for the package. Then, click Save.
Pack and Ship in Small Parcel
- Navigate to Small Parcel space. Then click Settings on the left navigation menu.
- Next, select the Customer name.

- Scroll down to the General section and ensure that the 'Include Shipping Cost' option is marked. This is to make sure that the rate is captured from the carrier and brought back in to Billing Manager.

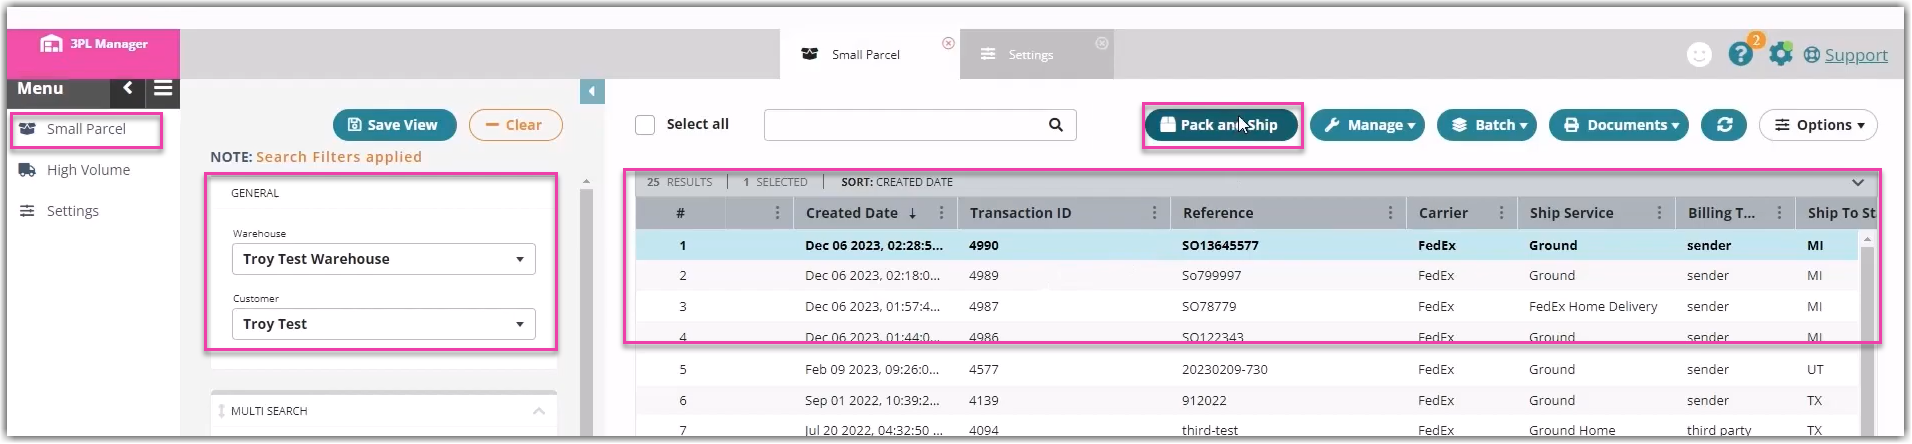
- Navigate to Small Parcel, filter by customer name, and select an order from the list that is ready to be packed and shipped.
- Click Pack and Ship. This will open the Pack and Ship Orders window.
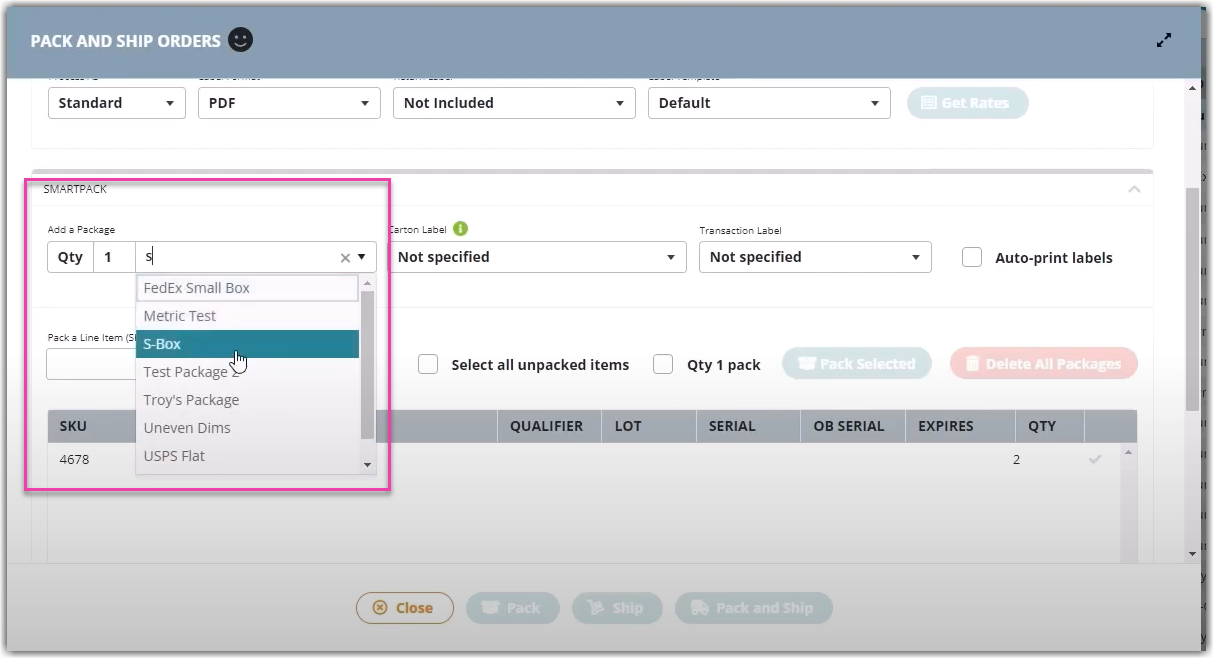
- Scroll down to the Smartpack section. Click the dropdown arrow to select the type of package you want to use. In the below example, let's select S-Box.
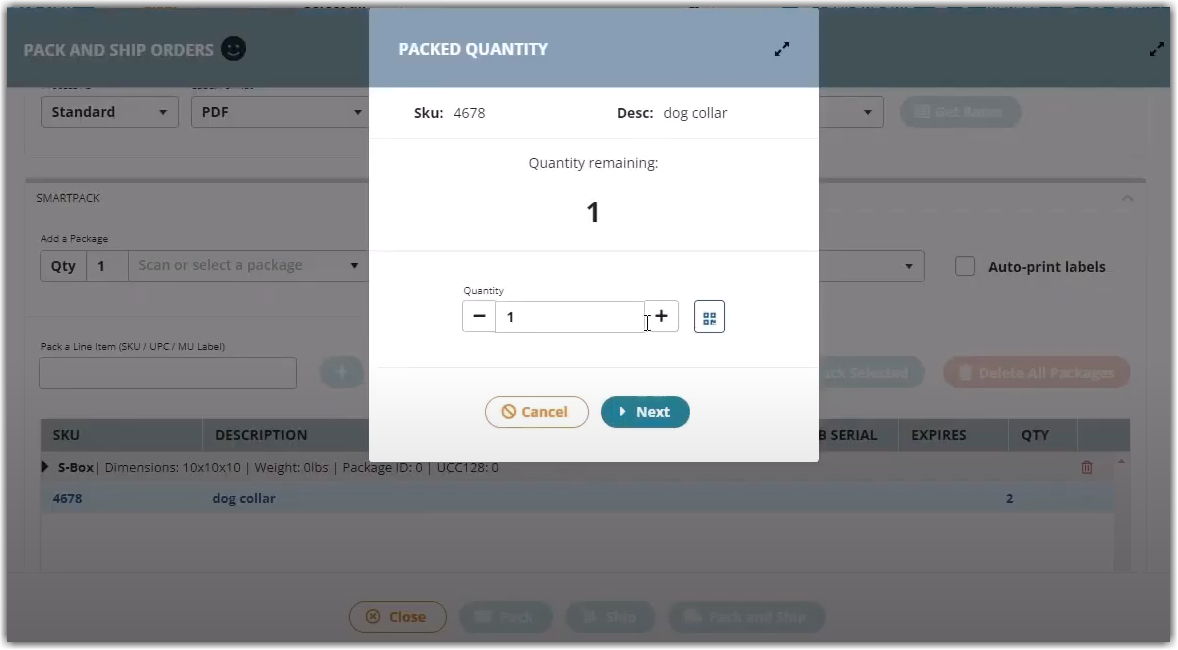
- Click the order to proceed with packing the product. This will open the Packed Quantity window. Then, specify the quantity.
- Click the Pack and Ship button. This will produce a label.
You can now close the order since you have both the Tracking Number and Ship Date. - Select the order from the list and hover over Manage and select Close Orders.

- On the Ship and Close window, click Ship and Close.
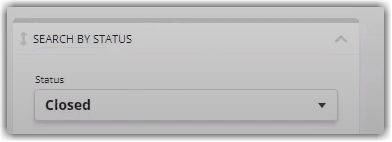
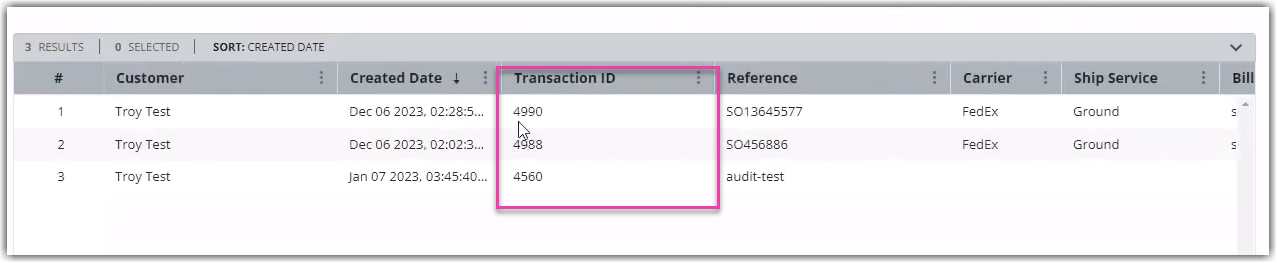
- Get the Transaction ID. On the same Small Parcel page, change the filter by status to Closed.
- Scroll to the right to find the Transaction ID as you need this to find the charge in Billing Manager.
Reviewing charge in Billing Manager
- Open Billing Manager.
- Navigate to Charges and search by Transaction ID. In this example, the ID is 4990.
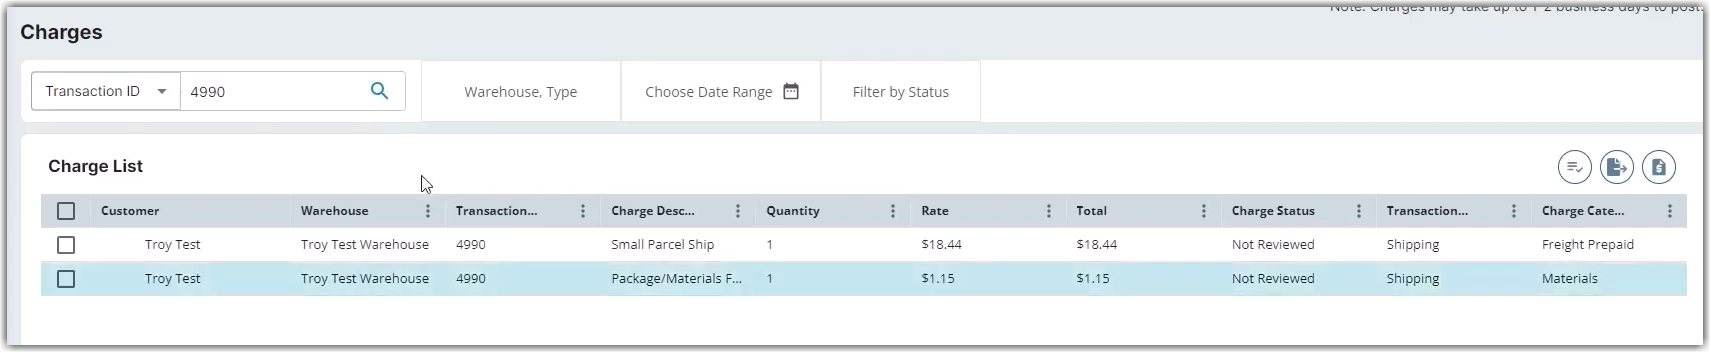
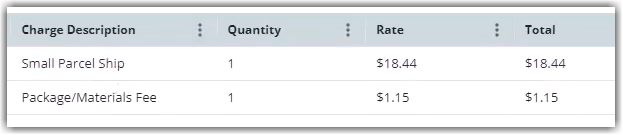
In the above image, please note that the results show the Package/Materials Fee was applied for the amount of $1.15, and the Small Parcel Shipping label fee was moved to the Billing Manager. These can now be invoiced to your customer.