3PL Warehouse Manager

Updated on July 13th, 2023

  • Extensiv Hub
    Popular Articles Getting Started Using Hub Technical Issues & FAQs Extensiv's Ideas Portal
  • 3PL Warehouse Manager
    Receiving Operations Inventory Management Shipping Operations System Configuration Scanning Operations Integrations Content Best Practice Resources Release Notes Popular Articles Troubleshooting Guides
  • Warehouse Management
    Getting Started Admin Console Shipping Order Picking & Packing Receiving Customer Portal Cycle Counting Kit Building Managing Users Barcode Scanner Import/Export Integrations Barcoding Wave Picking Bin Move Mobile Receiving and Picking Settings Popular Articles Reporting
  • Order Management
    Dashboard Orders Inventory Purchase Orders Shipments Customers Products Analytics Settings API API Integrations Accessing and Navigating Order Manager Error Messages Order Manager Popular Articles Accounting Integrations
  • Integration Management
    Getting Started with Integration Manager General Support Troubleshooting Extras & Addons API Documentation Popular Articles Order Sources Order Destinations
  • FAQs
  • Network Manager
    Getting Started Order Routing Management Technical Issues Shopping Carts Settings Settings, Products, and Orders
  • Billing Manager
    Getting Started Using Billing Manager
  • Release Notes
    Extensiv Sandbox Extensiv Extensiv Hub 3PL Warehouse Manager Integration Management Warehouse Management Order Management Billing Manager
  • Fulfillment Marketplace
    Getting Started
  • Sandbox
    Getting Started
+ More
  • Help Center
  • 3PL Warehouse Manager
  • Shipping Operations
  • Shipping Setups
  • Shipping Operations
    • Order Creation
        • Creating Orders
        • Importing Orders
        • Entering Order Contact Details
        • Entering Order Line Items
        • Entering Carrier and Routing Information
        • Entering Custom Order Info
        • Entering Order Charges
        • Cloning an Order
    • Order Management
        • Understanding Order Statuses
        • Navigating the Find Orders Page
        • Generating Order Documents
        • Batch Order Processing
        • Adjusting Order Charges
    • Shipping Setups
        • Understanding the Parcel API
        • Connecting Carriers to Providers
        • Understanding Carrier Account Logic
        • Configuring Zebra Browser Print
        • Configuring Small Parcel Settings
        • Using Address Validation
        • Connecting Multiple Accounts for the Same Carrier
        • Managing Carrier Accounts
        • Configuring Fulfillment Invoicing
        • Using a Flat File Carrier Integration
        • Managing Shipping Carriers
        • Configuring a Drop Ship Address
        • Managing Ship-to Contacts
        • Managing Retailers
        • Importing Ship-to Contacts
        • Managing Ship Method Mappings
        • Managing 3rd-Party-Billing Contacts
        • Shipping Hazardous Materials
    • Small Parcel Carriers
        • Shipping in Small Parcel Suite
        • Shipping with Amazon Buy
        • Shipping with APC
        • Shipping with Australia Post
        • Shipping with Canada Post
        • Shipping with Canpar
        • Shipping with DHL eCommerce
        • Shipping with DHL Express (AU)
        • Shipping with DHL Express (US)
        • Shipping with ePost Global
        • Shipping with FedEx
        • Shipping with FirstMile
        • Shipping With Flexport
        • Shipping with Globegistics
        • Shipping with Landmark
        • Shipping with OnTrac
        • Shipping with PARCLL
        • Shipping with Passport
        • Shipping with Pitney Bowes Cross-Border Delivery
        • Shipping with Pitney Bowes Standard
        • Shipping with Purolator
        • Shipping with RR Donnelley
        • Shipping with SEKO Ecommerce
        • Shipping with Sendle
        • Shipping with Stallion Express
        • Shipping with Tusk Logistics
        • Shipping with UPS
        • Shipping with USPS (BUKU Ship)
        • Shipping with USPS (Endicia)
        • Shipping with USPS (Stamps.com)
        • Shipping with UPS Mail Innovations®
        • Shipping with FedEx One Rate®
        • Shipping with USPS (Pitney Bowes Expedited)
        • Connecting Small Parcel to UPS
    • Packing Basics
        • Packing Orders
        • Managing Packing Materials
        • Configuring Scales for SmartPack
        • Creating Packing Slip Templates
        • Processing Packages
        • Understanding Automatic Package Generation
        • Consolidating Packages
        • Recalculating Packages
        • Using Packing Materials
        • Understanding Multi-Tier Packing in Process Packages
    • Order Processing
        • Navigating the Small Parcel Homepage
        • Packing in the Small Parcel Space
        • Shipping in the Small Parcel Space
        • Using High Volume Processing (HVP) with SmartParcel
        • Printing Return Labels
        • Printing Combo Labels
        • Voiding Shipping Labels
        • Troubleshooting Blank Shipping Labels
        • Creating End of Day Requests (Manifesting)
    • Billing Best Practices for Shipping
        • Common Transactional Shipping Charges
        • Flat Order Processing Fees
        • Item-Based Handling Fees
        • Freight Fees
    • International Shipping
        • Shipping Internationally with SmartParcel
        • Capturing Digital Assets for FedEx ETD
        • Tax Identifiers in Small Parcel Suite
        • Package Description for Mexico Shipments
      • Enabling Integrated Packing Slip

Managing Carrier Accounts

Once you've connected a carrier account to SmartParcel, you can edit certain values entered at the time of creation or delete an account altogether. This article reviews how to edit and delete existing customer and warehouse carrier accounts.

Guidelines

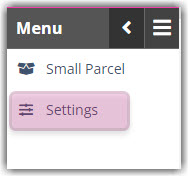
Navigate to the Small Parcel space, then select Settings. Choose a customer from the drop-down menu, then continue reading below.

Your browser does not support HTML5 video.

Edit carrier accounts

Below is a breakdown of the fields you can edit for certain customer and warehouse carrier accounts or suggested next steps if editing is not supported. Before you continue, please note that the following rules apply to all carrier accounts:

  • You cannot edit the Account Number field.
  • If you have the same account set up in multiple places (for warehouse and customer, or across databases) and edit the Nickname or Zip Code for any of these accounts, this change applies to each account.

UPS accounts

You can edit the following values for an existing UPS account:

  • Account Nickname
  • Account Zip / Postal Code
  • Pickup Type
  • Use Carbon Neutral Shipping Program
  • Use Ground Freight Pricing
  • Primary UPS account
  • Use Negotiated Rates
    • If not selected when the account was originally added, you can enable "Use negotiated rates" as part of the edit. You must also use a recent invoice to enter the required Invoice Information.
    • If 'Use negotiated rates' was selected when adding the account, you cannot use the edit functionality to disable this option. To disable, you must delete and re-add the carrier account on the Small Parcel Settings page.


FedEx accounts

You can edit the following values for an existing FedEx account.

  • Account Nickname
  • Account Zip / Postal Code
  • Smart Post Hub
  • Smart Post Endorsement
  • Primary FedEx account


USPS (Endicia and Stamps.com) accounts

Endicia and Stamps.com do not offer the ability to edit accounts. If you need to change your passphrase or any other account details, we suggest that you delete and re-add the carrier account on the Small Parcel Settings page.

DHL Express accounts

We do not plan to allow editing of DHL Express accounts at this time. DHL only allows editing of a small number of fields that would not be useful to the account editing experience. If you'd like, you can submit a Product Idea to indicate that we should work with DHL on implementing this in the future.

All other carrier accounts

All other carriers available on the Small Parcel Settings page do not currently support the Edit functionality. If you need to modify a customer or warehouse account for a carrier other than UPS or FedEx, you must delete and re-add the carrier account on the Small Parcel Settings page.

Delete carrier accounts

If you need to remove an existing carrier account or make changes to an account that does not allow editing, you can delete that account from the Small Parcel Settings page. Simply select the account from the grid, then click Delete. If successful, a confirmation message appears.

If an error occurs when you attempt to delete a carrier account, please click Show Details in the top-right corner of the error message, take a screen capture of the message, then please reach out to Extensiv Support with the attached screen capture and replication details.

accounts managing

Was this article helpful?

Yes
No
Share additional feedback about this article

Related Articles

  • Value-Added Service Fees
  • Support Portal FAQs
  • ShipStation Integration
  • January 22, 2020 – Minor Release Notes

Not finding the help you need?

Contact Support
Solutions
  • Solutions for Brands
  • Solutions for 3PLs
  • Solutions for 4PLs
  • Solutions for B2B
Products
  • Extensiv 3PL Warehouse Manager
  • Extensiv Warehouse Manager
  • Extensiv Order Manager
  • Extensiv Integration Manager
  • Extensiv Network Manager
Products
  • Customer Success
  • Implementation
  • Consulting
Ecosystem
  • Fulfillment Marketplace
  • Integrations
  • Partners
  • Become a Partner
Resources
  • Resource Library
  • Blog
  • Market Insights
  • What is a 3PL?
  • What is a 4PL?
  • What is a WMS?
  • Why a Cloud-based WMS?
  • Glossary
Help
  • Help Center
  • API Documentation
  • Extensiv Univerisity
  • Community
  • System Status
  • Extensiv Logo
  • 100 N Pacific Coast Hwy, Suite 1100, El Segundo, CA 90245
  • |
  • Contact Us:
  • 83-EXTENSIV 888.375.2368 (main)
  • |
  • 310.844.7570 (local)
  • Copyright © 2023 Extensiv
  • |
  • All rights reserved.
  • Privacy Policy
  • |
  • Terms of Service
  • Follow Us:
Expand