3PL Warehouse Manager

Updated on August 2nd, 2024

  • Extensiv Hub
    Popular Articles Getting Started Using Hub Technical Issues & FAQs Extensiv's Ideas Portal
  • 3PL Warehouse Manager
    Receiving Operations Inventory Management Shipping Operations System Configuration Scanning Operations Integrations Content Best Practice Resources Release Notes Popular Articles Troubleshooting Guides
  • Warehouse Management
    Getting Started Admin Console Shipping Order Picking & Packing Receiving Customer Portal Cycle Counting Kit Building Managing Users Barcode Scanner Import/Export Integrations Barcoding Wave Picking Bin Move Mobile Receiving and Picking Settings Popular Articles Reporting
  • Order Management
    Dashboard Orders Inventory Purchase Orders Shipments Customers Products Analytics Settings API API Integrations Accessing and Navigating Order Manager Error Messages Order Manager Popular Articles Accounting Integrations
  • Integration Management
    Getting Started with Integration Manager General Support Troubleshooting Extras & Addons API Documentation Popular Articles Order Sources Order Destinations
  • FAQs
  • Network Manager
    Getting Started Order Routing Management Technical Issues Shopping Carts Settings Settings, Products, and Orders
  • Billing Manager
    Getting Started Using Billing Manager
  • Release Notes
    Extensiv Sandbox Extensiv Extensiv Hub 3PL Warehouse Manager Integration Management Warehouse Management Order Management Billing Manager
  • Fulfillment Marketplace
    Getting Started
  • Sandbox
    Getting Started
+ More
  • Help Center
  • 3PL Warehouse Manager
  • Shipping Operations
  • Small Parcel Carriers
  • Shipping Operations
    • Order Creation
        • Creating Orders
        • Importing Orders
        • Entering Order Contact Details
        • Entering Order Line Items
        • Entering Carrier and Routing Information
        • Entering Custom Order Info
        • Entering Order Charges
        • Cloning an Order
    • Order Management
        • Understanding Order Statuses
        • Navigating the Find Orders Page
        • Generating Order Documents
        • Batch Order Processing
        • Adjusting Order Charges
    • Shipping Setups
        • Understanding the Parcel API
        • Connecting Carriers to Providers
        • Understanding Carrier Account Logic
        • Configuring Zebra Browser Print
        • Configuring Small Parcel Settings
        • Using Address Validation
        • Connecting Multiple Accounts for the Same Carrier
        • Managing Carrier Accounts
        • Configuring Fulfillment Invoicing
        • Using a Flat File Carrier Integration
        • Managing Shipping Carriers
        • Configuring a Drop Ship Address
        • Managing Ship-to Contacts
        • Managing Retailers
        • Importing Ship-to Contacts
        • Managing Ship Method Mappings
        • Managing 3rd-Party-Billing Contacts
        • Shipping Hazardous Materials
    • Small Parcel Carriers
        • Shipping in Small Parcel Suite
        • Shipping with Amazon Buy
        • Shipping with APC
        • Shipping with Australia Post
        • Shipping with Canada Post
        • Shipping with Canpar
        • Shipping with DHL eCommerce
        • Shipping with DHL Express (AU)
        • Shipping with DHL Express (US)
        • Shipping with ePost Global
        • Shipping with FedEx
        • Shipping with FirstMile
        • Shipping With Flexport
        • Shipping with Globegistics
        • Shipping with Landmark
        • Shipping with OnTrac
        • Shipping with PARCLL
        • Shipping with Passport
        • Shipping with Pitney Bowes Cross-Border Delivery
        • Shipping with Pitney Bowes Standard
        • Shipping with Purolator
        • Shipping with RR Donnelley
        • Shipping with SEKO Ecommerce
        • Shipping with Sendle
        • Shipping with Stallion Express
        • Shipping with Tusk Logistics
        • Shipping with UPS
        • Shipping with USPS (BUKU Ship)
        • Shipping with USPS (Endicia)
        • Shipping with USPS (Stamps.com)
        • Shipping with UPS Mail Innovations®
        • Shipping with FedEx One Rate®
        • Shipping with USPS (Pitney Bowes Expedited)
        • Connecting Small Parcel to UPS
    • Packing Basics
        • Packing Orders
        • Managing Packing Materials
        • Configuring Scales for SmartPack
        • Creating Packing Slip Templates
        • Processing Packages
        • Understanding Automatic Package Generation
        • Consolidating Packages
        • Recalculating Packages
        • Using Packing Materials
        • Understanding Multi-Tier Packing in Process Packages
    • Order Processing
        • Navigating the Small Parcel Homepage
        • Packing in the Small Parcel Space
        • Shipping in the Small Parcel Space
        • Using High Volume Processing (HVP) with SmartParcel
        • Printing Return Labels
        • Printing Combo Labels
        • Voiding Shipping Labels
        • Troubleshooting Blank Shipping Labels
        • Creating End of Day Requests (Manifesting)
    • Billing Best Practices for Shipping
        • Common Transactional Shipping Charges
        • Flat Order Processing Fees
        • Item-Based Handling Fees
        • Freight Fees
    • International Shipping
        • Shipping Internationally with SmartParcel
        • Capturing Digital Assets for FedEx ETD
        • Tax Identifiers in Small Parcel Suite
        • Package Description for Mexico Shipments
      • Enabling Integrated Packing Slip

Shipping with Canada Post

This article reviews the features and services available when shipping Canada Post orders through Small Parcel Suite, as well as how to connect a Canada Post carrier account to Small Parcel Suite.

Supported providers

Label Provider Supports Canada Post?
BUKU Ship No
Pitney Bowes No
ShipEngine Yes

Supported features

Feature Description  Supported?
Adult Signature

Requires recipient to sign for a delivery and be at least 21 years old

(Configured under Shipping Info)

Yes
Carrier Insurance

Insurance available for purchase through carrier

(Configured under Shipping Info)

Yes
Delivery Confirmation

Allows recipient to receive text or email notification upon delivery

(Configured under Shipping Info)

Yes
Domestic Shipping Shipping supported in U.S.
 
Yes
Electronic Customs Submission Commercial invoice is automatically delivered to customs after shipping label is printed No
End of Day (Electronic) Order is automatically manifested with carrier No*
End of Day (PDF) Manifest can be downloaded as a PDF file Yes**
International Shipping Shipping supported outside of U.S. Yes
Label Reference Fields

Allows up to three label messages per shipping label

(Configured in Small Parcel Settings)

Yes
Multi-Package Shipping Multiple packages allowed per shipment
 
No
Multiple Accounts Allows connection of multiple prepaid billing accounts Yes
Rate Shopping

Returns estimated shipping rates

(Configured in Small Parcel Settings)

Yes
Return Labels Allows printing of return labels Yes
Signature Confirmation

Requires someone at or near the delivery address to sign at time of delivery

(Configured under Shipping Info)

Yes
Tracking Verification of delivery progress
 
Yes

*Because the Canada Post eLink program requires electronic data transmission for manifests, which our carrier integration does not currently support, we recommend that you check with your Canada Post account representative before using this type of account with 3PL Warehouse Manager.

**Please note that small business accounts have no manifest requirements, but commercial accounts are required to manifest each day's shipments and provide a physical copy to the driver. If you have questions on which of these applies to you, please contact your Canada Post account representative.

Supported services

The ship services listed below are available when shipping Canada Post orders in 3PL Warehouse Manager. Please note that these service names may vary slightly from their official carrier labels.

Service Transport Territory
Expedited Parcel Canada
Expedited Parcel USA International
International Parcel Air International
International Parcel Surface International
Library Books Canada
Priority Canada
Priority Worldwide Envelope Intl International
Priority Worldwide Envelope USA International
Priority Worldwide Pak Intl International
Priority Worldwide Pak USA International
Priority Worldwide Parcel Intl International
Priority Worldwide Parcel USA International
Regular Parcel Canada
Small Packet Air – USA International
Small Packet International Air International
Small Packet International Surface International
Tracked Packet – International International
Tracked Packet – USA International
Tracked Packet – USA (LVM) International
Xpresspost Canada
Xpresspost Certified Canada
Xpresspost International International
Xpresspost USA International

Connection guidelines

Before you can start shipping orders through Canada Post, you must first connect your Canada Post account to Small Parcel Suite from the Small Parcel Settings page.

Once you connect a customer's Canada Post account to Small Parcel Suite, you cannot use your primary warehouse account for that customer when shipping with Canada Post.

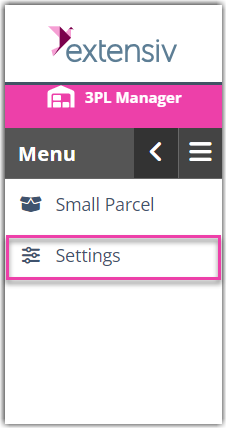
  1. Navigate to the Small Parcel space, then select Settings and choose a customer from the drop-down menu.
  2. In the Carrier Accounts section, click Create.
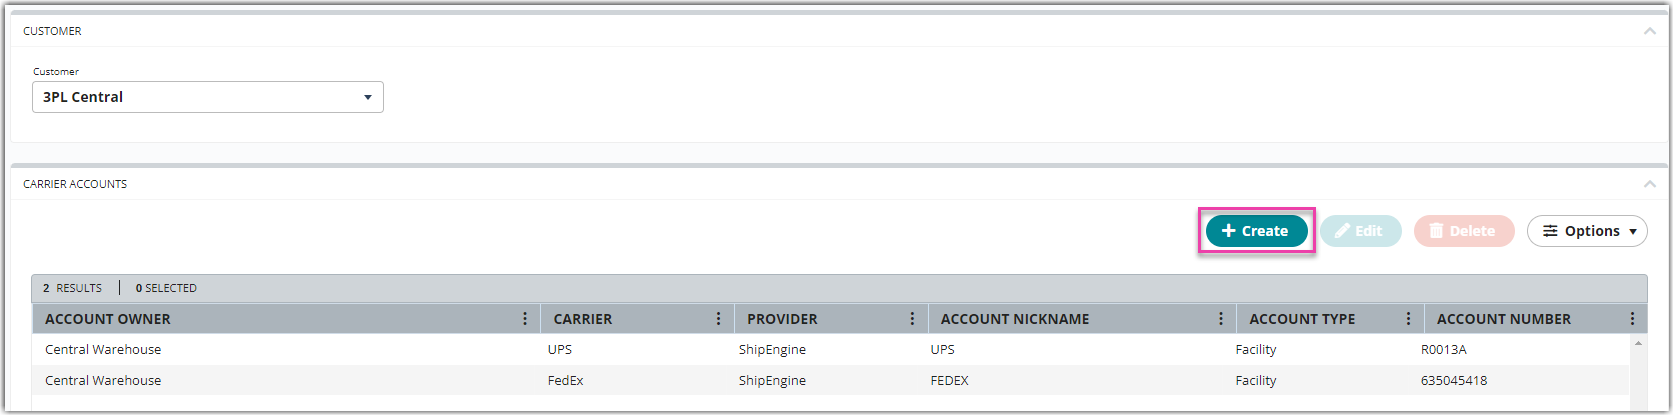
  3. Using the drop-down menus, specify whether you are setting up a 'Warehouse Account' or 'Customer Account', select the relevant warehouse or customer, choose Canada Post, then click Next.
  4. For 'Account Nickname', enter a descriptive name to identify the account.
  5. Enter your 'Account Number', 'Contract ID', 'API Key', and 'API Secret' in the corresponding fields, then click Connect to receive a confirmation message.

    If you need help retrieving your API credentials, please reach out to your account representative at Canada Post.


Once connected, the carrier account is instantly set up, and your warehouse can start shipping against the account.

Note:

If this carrier account is registered in a country that is different from where your 3PL account is located (defined under Admin > Manage Company Info), you must first reach out to Support so they can update this carrier account's home country before you can begin shipping with the account.


We recommend printing 1–2 test shipping labels at least one business day in advance of needing to print labels for active shipments.

If you plan on connecting multiple accounts for a single carrier, please see Connecting Multiple Accounts for the Same Carrier before repeating Steps 1–5 above.


mailing postage

Was this article helpful?

Yes
No
Share additional feedback about this article

Related Articles

  • Stock Status Report
  • Getting Started with GS1 Barcodes
  • Creating Orders
  • Creating Receipts

Not finding the help you need?

Contact Support
Solutions
  • Solutions for Brands
  • Solutions for 3PLs
  • Solutions for 4PLs
  • Solutions for B2B
Products
  • Extensiv 3PL Warehouse Manager
  • Extensiv Warehouse Manager
  • Extensiv Order Manager
  • Extensiv Integration Manager
  • Extensiv Network Manager
Products
  • Customer Success
  • Implementation
  • Consulting
Ecosystem
  • Fulfillment Marketplace
  • Integrations
  • Partners
  • Become a Partner
Resources
  • Resource Library
  • Blog
  • Market Insights
  • What is a 3PL?
  • What is a 4PL?
  • What is a WMS?
  • Why a Cloud-based WMS?
  • Glossary
Help
  • Help Center
  • API Documentation
  • Extensiv Univerisity
  • Community
  • System Status
  • Extensiv Logo
  • 100 N Pacific Coast Hwy, Suite 1100, El Segundo, CA 90245
  • |
  • Contact Us:
  • 83-EXTENSIV 888.375.2368 (main)
  • |
  • 310.844.7570 (local)
  • Copyright © 2023 Extensiv
  • |
  • All rights reserved.
  • Privacy Policy
  • |
  • Terms of Service
  • Follow Us:
Expand