Packing in the Small Parcel Space
5.3 min read
|Once you prepare your orders for small parcel processing from the Small Parcel homepage, it's time to begin packing your order contents. This article reviews how to pack small parcel orders in the Small Parcel space.
If you plan to pack using SmartPack, please ensure that the following criteria has been met within the WMS before you get started:
- SmartPack is turned on and enabled for your account under Admin > Settings in the WMS
- If you plan on scanning barcodes, a USB or Bluetooth barcode scanner is attached to the PC at each packing station
- If your packages are not barcoded, barcode cheat sheets are placed at each packing station (template found under Documents > Barcode Cheat Sheet on Small Parcel homepage)
- If utilizing carton labels, UCC-128 labels are enabled for your account (contact your CSM to learn more)
- If weighing packages, you understand how to connect and utilize your postal scale (see Configuring Scales for SmartPack for guidelines)
We also recommend having all package types fully configured via Orders > Manage Packaging in the WMS before proceeding with packing in the Small Parcel space. However, if needed, you can create a new package definition from the Small Parcel homepage via Manage > New Package Type.
Guidelines
If you're in the WMS, navigate to the Small Parcel space via the Spaces menu.
Depending on your workflow and the type of orders you're dealing with, the time at which you print packing slips likely varies. Whether you choose to print packing slips before or after you pack an order, use the following steps:
- Select the order from the grid, then click Documents > Packing Slip
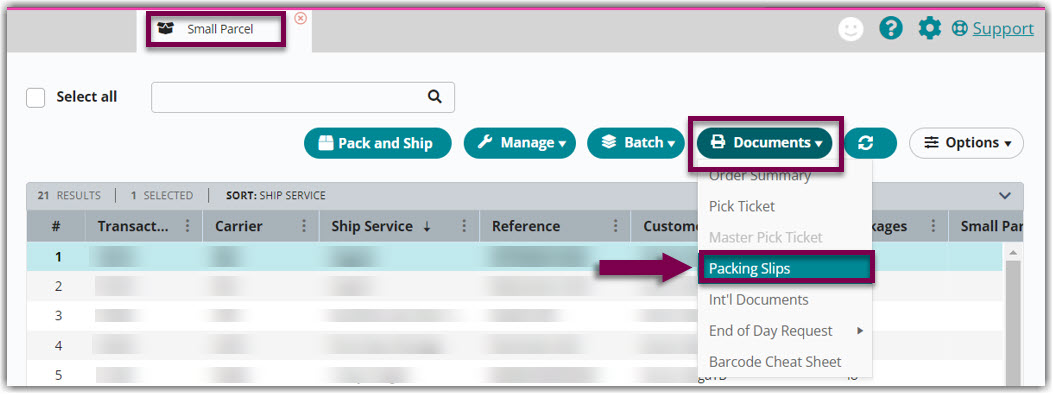
2. Choose the appropriate type, template, and format from the respective drop-down menus.
3. Click Generate to print the packing slip(s).
Pack using an automated method
As explained in Navigating the Small Parcel Space, it is important to understand that the nature of your orders determines how your orders should be packed. If you are working with a set of orders that have similar SKU and package configurations, one of our automatic packing methods will likely fit your needs.
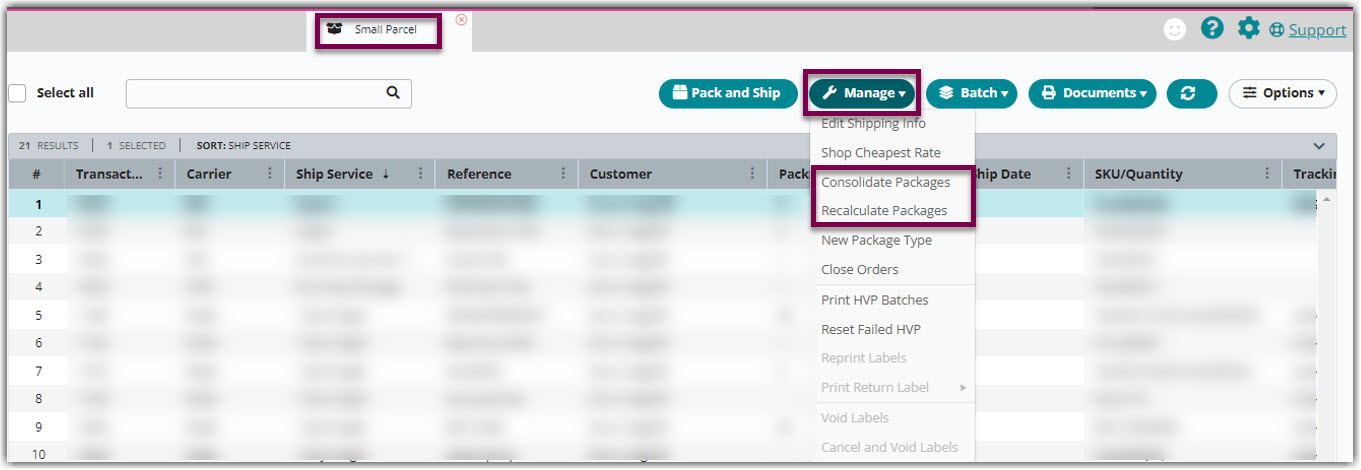
- The Consolidate Packages feature is best used when you can fit all order contents into a single package and when multiple orders share the same package type. When using this packing method for one or more orders, you are indicating that you have already packed all contents of each individual order into the specified package type.
- The Recalculate Packages feature is best used when your order contents have accurate package data defined under Items > Manage Items in the WMS. When you select this option for one or more orders, you are indicating that you have already packed all order contents into the fewest number of packages according to your item setup.
To learn more about the system logic behind these automatic packing methods, please see Understanding Automatic Package Generation.
Pack using SmartPack
If you are packing orders that have variable SKU/package configurations, it is best practice to pack each order using SmartPack. There are two ways to get started with SmartPack:
- Select an order from the Small Parcel grid, then click Pack and Ship to open the Pack and Ship Orders dialog. (Please note that SmartPack is used to pack a single order at a time. If you select multiple orders prior to clicking Pack and Ship, you cannot utilize SmartPack.)

- Identify an order to pack by using the search field above the data grid to scan or enter the order's transaction ID, reference number, or bin ID. When you open the Small Parcel homepage, the system immediately puts the focus on the field to allow for a quick and easy scan.
You can also pull up an order by scanning a SKU. Scanning a SKU will load orders that have only a single quantity of the scanned SKU. If there is more than one SKU on the order or a quantity greater than 1 of the scanned SKU it will not be loaded. Scanning a SKU will always load the oldest order containing that item.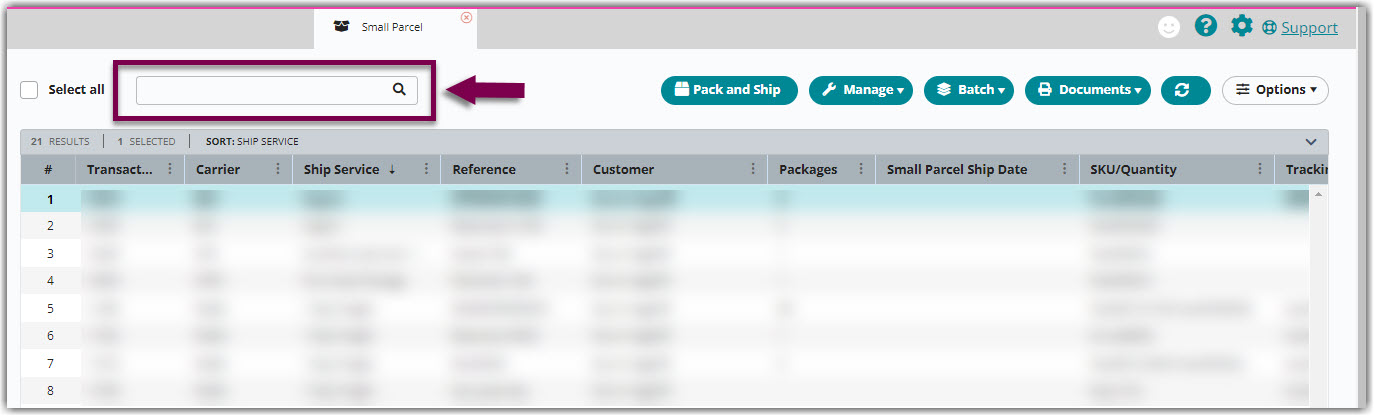
Next, locate the SmartPack container. (If you do not have SmartPack enabled for your account, this section is disabled.) Before proceeding with the packing steps below, please take note of the following label-printing options. You must make these selections prior to any print event during the packing process.
-
Carton Label: This drop-down list contains default carton and UCC-128 label templates. To view the full list of UCC-128 label templates, see our Extensiv Carton Label Library.
If your UCC label needs to include a BOL number, you must generate a BOL prior to printing the label.
- Transaction Label: This drop-down option allows you to print a transaction label.
-
Auto print labels: When selected, this option automates the printing of your carton and transaction label selections for each package on the order after you finalize the pack.
If you want to have this option selected by default, enable 'SmartPack – Auto-print labels on Pack' under Orders > General Settings in a customer's setup.
- If you choose not to auto-print these labels, you can instead select the blue Print icon on a package line item to print individual package labels.
Once you decide on your label-printing needs, use the following steps to pack your order.
- Specify the first package by scanning the package barcode or selecting a package type from the 'Add a Package' drop-down list. If you want to add multiple packages at once, adjust the 'Qty' as needed.
The specified package type populates in the first gray row of the grid.If you have a postal scale configured and would like to use custom package dimensions in place of a configured package type, select Custom Dimensions at the bottom of the drop-down list, enter the dimensions, then click Save.
-
Optional: If you don't plan on grouping your pack by SKU (e.g., pack the full quantity of SKU A before packing the full quantity of SKU B), enable Qty 1 pack above the grid.
- Begin packing each item into the specified package by scanning the item barcode; entering the relevant SKU, UPC, or MU Label value in the 'Pack a Line Item' field; or selecting the line item from the grid.
If you want to pack multiple items in one package, select the checkbox next to Select all unpacked items, or press < Ctrl > or < Shift > on your keyboard and select the relevant line items, then click Pack Selected.- If you don't have 'Qty 1 pack' enabled and the line item quantity is greater than 1, adjust the quantity as needed by scanning each individual SKU or manually entering a quantity. If you are packing a partial quantity, click Next.
The icon to the right of the Quantity field lets you increment quantity via scanning. The system puts focus into this icon by default (signified by the color blue). Please note that if you manually interact with the Quantity field, this disables the ability to increment quantity via scanning and requires you to select this icon to enable scanning again.
- If utilizing outbound serialization, scan or enter each serial number as needed.
- If the order has multiple line items with the same SKU, scanning the SKU to pack a line item selects the first line item in the grid that matches the scanned SKU. If you need to pack in a different order, you must manually select the line item from the grid rather than scan its SKU.
- If you need to unpack an item, select it from the grid, then click Unpack SKU.
- If you need to move an item to a different package on the order, select the item from the grid, identify the new package from the drop-down list, then click Save.
- If you don't have 'Qty 1 pack' enabled and the line item quantity is greater than 1, adjust the quantity as needed by scanning each individual SKU or manually entering a quantity. If you are packing a partial quantity, click Next.
- A green check populates on the far-right of each line item that is packed successfully. If there are additional packages on the order, repeat Steps 1–3 until all items are packed.
- To edit a package type, click the blue Edit icon on the package line item, then select a new package type and update the weight or reference fields as needed.
- If you enter a custom weight, please note that updating the package type or contents resets the weight to the default value calculated by the system.
- To remove one or more packages, click the Delete icon on a package line item or click Delete All Packages. This action also unpacks all line items associated with each deleted package.
- To edit a package type, click the blue Edit icon on the package line item, then select a new package type and update the weight or reference fields as needed.
- Once you pack all items on the order, it's time to finalize the packing process with one of the following options:
- If you are not printing shipping labels via SmartParcel, scan 'Pack' from the barcode sheet or click Pack in the dialog, then use the Manage menu on the Small Parcel homepage to print packing slips as needed and close the order.
- If you are using SmartParcel to print shipping labels, see our article on Shipping in the Small Parcel Space to complete your small parcel processing. Note that if you need to exit the Pack and Ship dialog to edit the order's shipping information, you can click Close without losing your packing progress.
Once you finalize the pack, the 'Pack Done Date' and 'Packages' values update accordingly in the Small Parcel grid.
