3PL Warehouse Manager

Updated on July 12th, 2023

  • Extensiv Hub
    Popular Articles Getting Started Using Hub Technical Issues & FAQs Extensiv's Ideas Portal
  • 3PL Warehouse Manager
    Receiving Operations Inventory Management Shipping Operations System Configuration Scanning Operations Integrations Content Best Practice Resources Release Notes Popular Articles Troubleshooting Guides
  • Warehouse Management
    Getting Started Admin Console Shipping Order Picking & Packing Receiving Customer Portal Cycle Counting Kit Building Managing Users Barcode Scanner Import/Export Integrations Barcoding Wave Picking Bin Move Mobile Receiving and Picking Settings Popular Articles Reporting
  • Order Management
    Dashboard Orders Inventory Purchase Orders Shipments Customers Products Analytics Settings API API Integrations Accessing and Navigating Order Manager Error Messages Order Manager Popular Articles Accounting Integrations
  • Integration Management
    Getting Started with Integration Manager General Support Troubleshooting Extras & Addons API Documentation Popular Articles Order Sources Order Destinations
  • FAQs
  • Network Manager
    Getting Started Order Routing Management Technical Issues Shopping Carts Settings Settings, Products, and Orders
  • Billing Manager
    Getting Started Using Billing Manager
  • Release Notes
    Extensiv Sandbox Extensiv Extensiv Hub 3PL Warehouse Manager Integration Management Warehouse Management Order Management Billing Manager
  • Fulfillment Marketplace
    Getting Started
  • Sandbox
    Getting Started
+ More
  • Help Center
  • 3PL Warehouse Manager
  • Shipping Operations
  • Shipping Setups
  • Shipping Operations
    • Order Creation
        • Creating Orders
        • Importing Orders
        • Entering Order Contact Details
        • Entering Order Line Items
        • Entering Carrier and Routing Information
        • Entering Custom Order Info
        • Entering Order Charges
        • Cloning an Order
    • Order Management
        • Understanding Order Statuses
        • Navigating the Find Orders Page
        • Generating Order Documents
        • Batch Order Processing
        • Adjusting Order Charges
    • Shipping Setups
        • Understanding the Parcel API
        • Connecting Carriers to Providers
        • Understanding Carrier Account Logic
        • Configuring Zebra Browser Print
        • Configuring Small Parcel Settings
        • Using Address Validation
        • Connecting Multiple Accounts for the Same Carrier
        • Managing Carrier Accounts
        • Configuring Fulfillment Invoicing
        • Using a Flat File Carrier Integration
        • Managing Shipping Carriers
        • Configuring a Drop Ship Address
        • Managing Ship-to Contacts
        • Managing Retailers
        • Importing Ship-to Contacts
        • Managing Ship Method Mappings
        • Managing 3rd-Party-Billing Contacts
        • Shipping Hazardous Materials
    • Small Parcel Carriers
        • Shipping in Small Parcel Suite
        • Shipping with Amazon Buy
        • Shipping with APC
        • Shipping with Australia Post
        • Shipping with Canada Post
        • Shipping with Canpar
        • Shipping with DHL eCommerce
        • Shipping with DHL Express (AU)
        • Shipping with DHL Express (US)
        • Shipping with ePost Global
        • Shipping with FedEx
        • Shipping with FirstMile
        • Shipping With Flexport
        • Shipping with Globegistics
        • Shipping with Landmark
        • Shipping with OnTrac
        • Shipping with PARCLL
        • Shipping with Passport
        • Shipping with Pitney Bowes Cross-Border Delivery
        • Shipping with Pitney Bowes Standard
        • Shipping with Purolator
        • Shipping with RR Donnelley
        • Shipping with SEKO Ecommerce
        • Shipping with Sendle
        • Shipping with Stallion Express
        • Shipping with Tusk Logistics
        • Shipping with UPS
        • Shipping with USPS (BUKU Ship)
        • Shipping with USPS (Endicia)
        • Shipping with USPS (Stamps.com)
        • Shipping with UPS Mail Innovations®
        • Shipping with FedEx One Rate®
        • Shipping with USPS (Pitney Bowes Expedited)
        • Connecting Small Parcel to UPS
    • Packing Basics
        • Packing Orders
        • Managing Packing Materials
        • Configuring Scales for SmartPack
        • Creating Packing Slip Templates
        • Processing Packages
        • Understanding Automatic Package Generation
        • Consolidating Packages
        • Recalculating Packages
        • Using Packing Materials
        • Understanding Multi-Tier Packing in Process Packages
    • Order Processing
        • Navigating the Small Parcel Homepage
        • Packing in the Small Parcel Space
        • Shipping in the Small Parcel Space
        • Using High Volume Processing (HVP) with SmartParcel
        • Printing Return Labels
        • Printing Combo Labels
        • Voiding Shipping Labels
        • Troubleshooting Blank Shipping Labels
        • Creating End of Day Requests (Manifesting)
    • Billing Best Practices for Shipping
        • Common Transactional Shipping Charges
        • Flat Order Processing Fees
        • Item-Based Handling Fees
        • Freight Fees
    • International Shipping
        • Shipping Internationally with SmartParcel
        • Capturing Digital Assets for FedEx ETD
        • Tax Identifiers in Small Parcel Suite
        • Package Description for Mexico Shipments
      • Enabling Integrated Packing Slip

Configuring Zebra Browser Print

Zebra Browser Print allows you to print directly to a Zebra ZPL printer, which is used in 3PL Warehouse Manager for printing labels in Small Parcel Suite and SmartScan. Please note that Browser Print supports Google Chrome, Mozilla Firefox, and Safari, but Microsoft Edge is not explicitly supported.

This article reviews the installation and configuration of Browser Print on a Windows computer and demonstrates the use of Browser Print with SmartParcel.

If you require instructions for an operating system other than Windows, please refer to Zebra's Browser Print User Guide and download the appropriate software version.


Step 1: Set your Zebra printer as default

Before you install Browser Print, you must first set your Zebra printer as your default printer.

  1. Navigate to your computer’s Control Panel.
  2. Under 'Hardware and Sound', click View devices and printers.
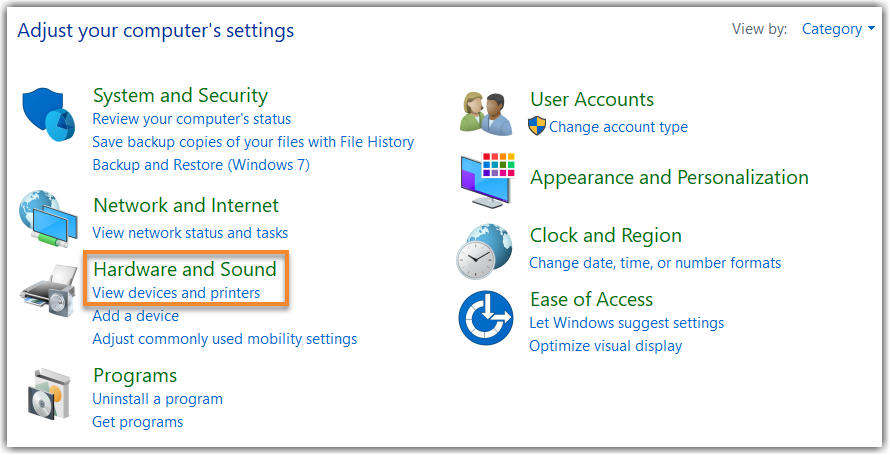
  3. Under 'Printers', right-click your Zebra printer, then select Set as default printer.

Step 2: Install Zebra Browser Print

Once you set your Zebra printer as default on your computer, it's time to install the Browser Print software.

  1. Download the Browser Print software.
  2. After the software is finished downloading, open the file to run Browser Print.
  3. Follow the on-screen prompts to complete the installation.
  4. Once installed, read the End User License Agreement, then click I Agree.
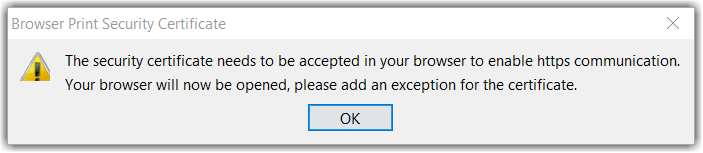
  5. A dialog box may appear to inform you that you must accept the security certificate in your browser to enable https communication. Click OK.


    Depending on your browser, you may be presented with a warning sign about this site not being safe. This warning appears when security certificates are self-signed. For these purposes, Zebra includes a self-signed certificate in their Browser Print utility. This certificate is used to facilitate communication between a web-based application, such as 3PL Warehouse Manager, and the Browser Print service that has been installed on your local machine (localhost).

    If the pop-up appears informing you that the site contains a security risks, click Advanced, then select the option to continue to the site—wording varies among browsers.

    If the pop-up does not appear, direct your browser to this link manually, then select the options to proceed to the site.


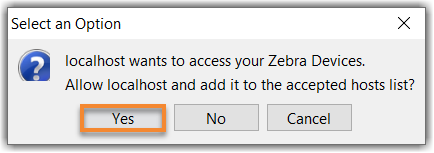
    Browser Print then asks for permission to access your system's printer. You must select Yes to provide access. Once you provide access, it is added to the list of accepted hosts in Browser Print.


If the installation is successful, the webpage informs you that "SSL Certificate has been accepted. Retry connection." You should then restart your browser.
 

Step 3: Configure your Browser Print settings

Once you install Browser Print, you need to configure the program’s settings.

In your desktop taskbar, right-click the Zebra icon, then select Settings.

This opens the Browser Print Settings, in which the following options are available:

  • Default Devices: Lists your default device set, which is different than the default printer set by the operating system. This can be changed once set via the Change button or via script.
  • Accepted Hosts: Lists web addresses that you have allowed access to your device. These can be removed using this screen.
  • Blocked Hosts: Lists web addresses that you have blocked access to your device. These can be removed using this screen.
  • Broadcast Search: Selection box that allows Zebra Browser Print to find and print on network-connected Zebra Printers.
  • Driver Search: Not supported in this release.

If using a network-shared printer, click the selection box next to Broadcast Search to allow for the network connection between your Zebra printer and Browser Print.

If your Zebra printer is not listed under 'Default Devices', click Change. The Select Default Device dialog box opens, in which all discoverable devices appear. Using the drop-down menus, select the relevant Device Type and Device for your Zebra printer, then click Set.
 

Step 4: Print a shipping label and allow system access

Before you can print labels, you must grant 3PL Warehouse Manager access to Browser Print.

  1. To get started, navigate to the Small Parcel space in 3PL Warehouse Manager.


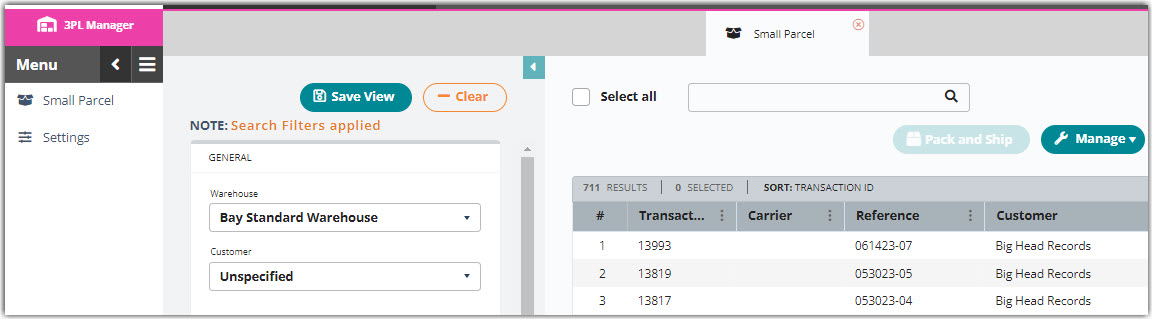
  2. Select an order from the Small Parcel grid, then click Pack and Ship.
     
  3. Select Standard for 'Process As', ZPL for the 'Label Format', then click Ship (or Pack and Ship if you've already packed the order).


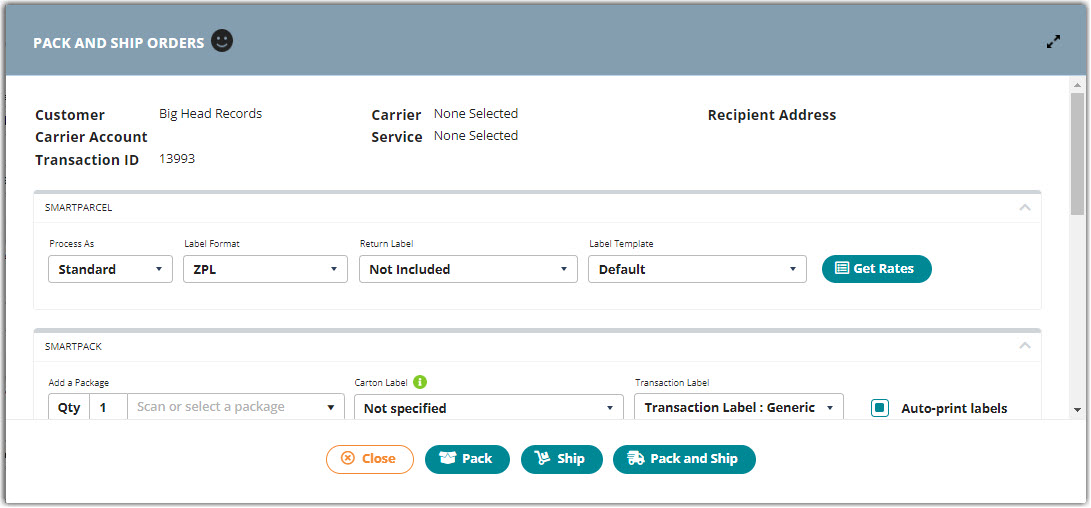
  4. 3PL Warehouse Manager then asks for permission to access your system's printer. You must select Yes to give our application access and add 3PL Warehouse Manager to the list of accepted hosts in Browser Print.
    • Once you add 3PL Warehouse Manager as an accepted host, you can print small parcel shipping labels with your Zebra printer using SmartParcel.
    • For more detailed instructions on using SmartParcel, please see Shipping in the Small Parcel Space.
       
  5. If you also plan to print movable unit (MU) labels using SmartScan, see our guidelines for Printing MU Labels in SmartScan for next steps.

    You cannot print from 3PL Warehouse Manager if you do not allow access to your printer. If the dialog box does not appear, uninstall Browser Print, restart your computer, then repeat these steps to reinstall and reconfigure Browser Print. Please contact Technical Support if the problem persists.


browser printing zebra setup zpl mu labels install zebra

Was this article helpful?

Yes
No
Share additional feedback about this article

Related Articles

  • Importing Receipts
  • Entering Custom Order Info
  • Understanding Flex Header and Standard Import Templates
  • Managing Customers

Not finding the help you need?

Contact Support
Solutions
  • Solutions for Brands
  • Solutions for 3PLs
  • Solutions for 4PLs
  • Solutions for B2B
Products
  • Extensiv 3PL Warehouse Manager
  • Extensiv Warehouse Manager
  • Extensiv Order Manager
  • Extensiv Integration Manager
  • Extensiv Network Manager
Products
  • Customer Success
  • Implementation
  • Consulting
Ecosystem
  • Fulfillment Marketplace
  • Integrations
  • Partners
  • Become a Partner
Resources
  • Resource Library
  • Blog
  • Market Insights
  • What is a 3PL?
  • What is a 4PL?
  • What is a WMS?
  • Why a Cloud-based WMS?
  • Glossary
Help
  • Help Center
  • API Documentation
  • Extensiv Univerisity
  • Community
  • System Status
  • Extensiv Logo
  • 100 N Pacific Coast Hwy, Suite 1100, El Segundo, CA 90245
  • |
  • Contact Us:
  • 83-EXTENSIV 888.375.2368 (main)
  • |
  • 310.844.7570 (local)
  • Copyright © 2023 Extensiv
  • |
  • All rights reserved.
  • Privacy Policy
  • |
  • Terms of Service
  • Follow Us:
Expand