Reporting in Warehouse Manager
3.6 min read
|Overview
This article explores the Warehouse Manager (WM) Reporting feature and to know more about the creation and editing of different kinds of reports.
WM gathers and displays data. They can be used in many ways, and if the data resides in WM, a report can usually be made from it. The only limiting factor is getting the information you want to display the way you want it. Customers can create and edit their own reports, and custom reports can be made by Professional Services for a fee. WM uses a third-party program called Izenda for its reporting. For further information on Izenda reports, please look here: https://wiki.izenda.us/Guides/ReportDesign.
Reporting Processes
The following explains the different processes involved in using the Report function in Warehouse Manager.
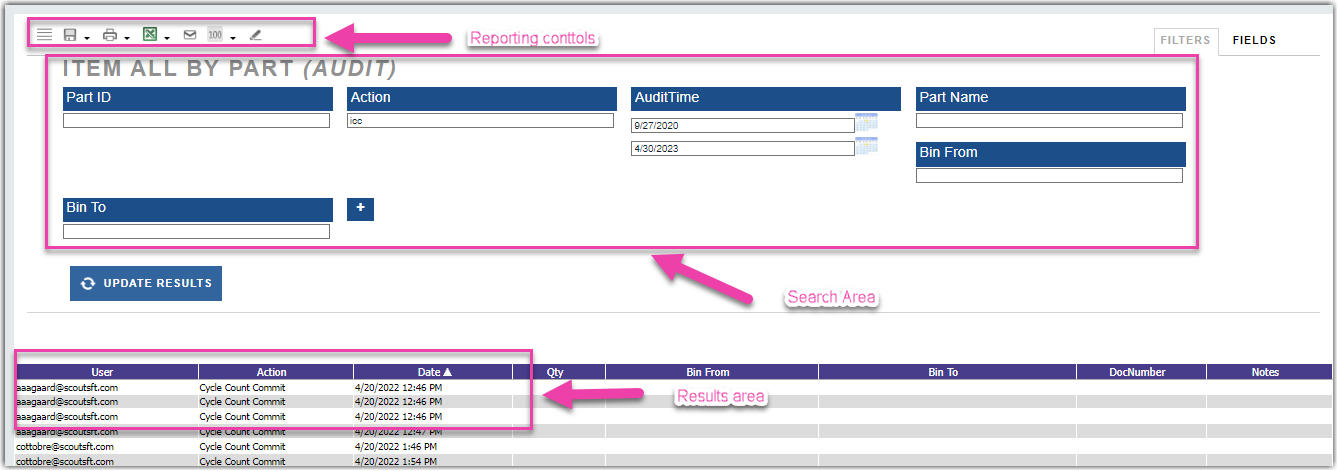
How to access reports
From the Warehouse Manager Unlimited Console, click on Reports located at the top navigation bar.

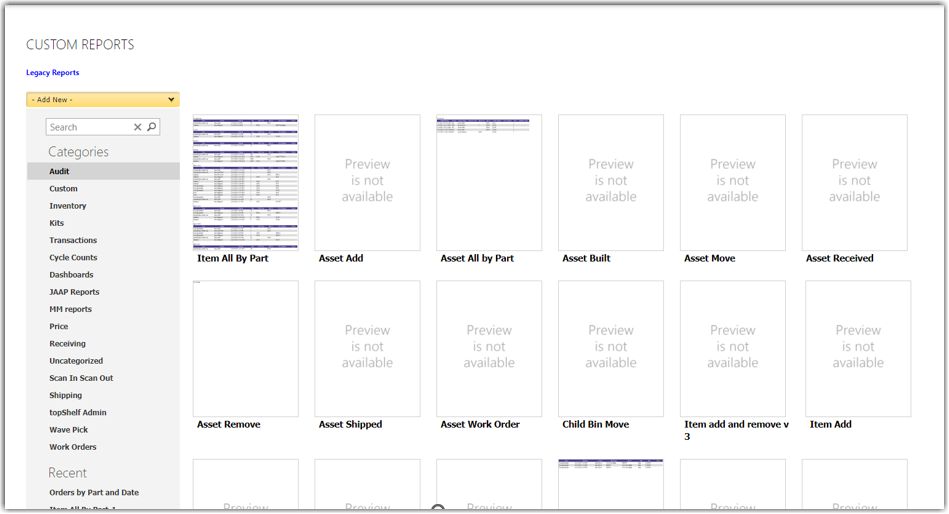
It will bring you to the Reports page, and from here you can create or edit a report.
Pulling up a Report
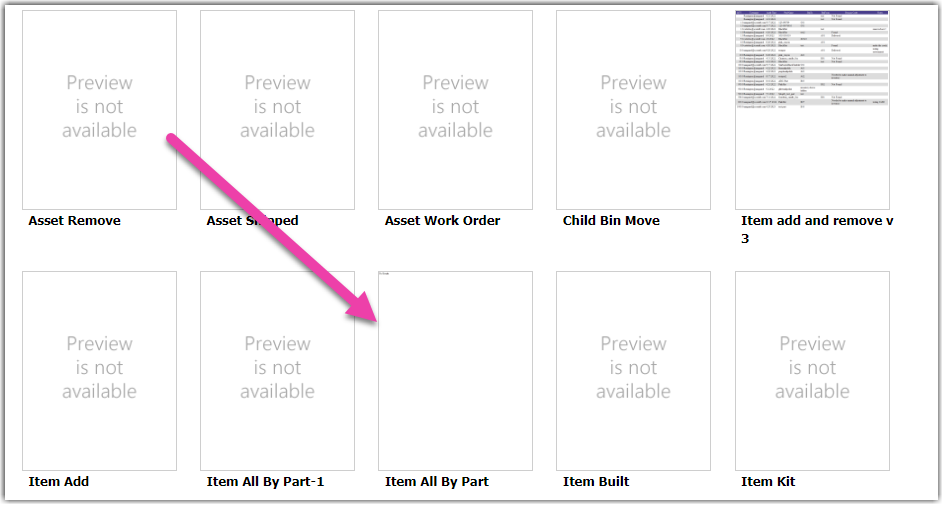
You can click on the report tile.
Or you can use the search bar
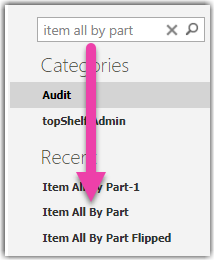
In the example above, the ‘Item All By Part’ is pulled from the selection and you will proceed to the Report edit page, as shown below.
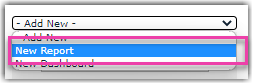
Creating a Report
To create a report, click the Add New dropdown and select New Report.
When you think of the report you want, check the existing reports to see if it’s a default one, or can easily be edited from a default one.
The first page you are taken to is the “Data Sources” page. This will be one of the most troublesome areas to work with as it may not be clear what data sources you need, and how to connect them.
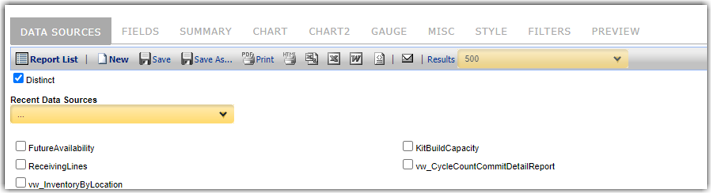
This is the simple Data Sources view, which allows you to know what sources link together. For our example, we want parts and orders, which in this case correspond to parts and documents. Think of data sources as where your data will reside in WM.
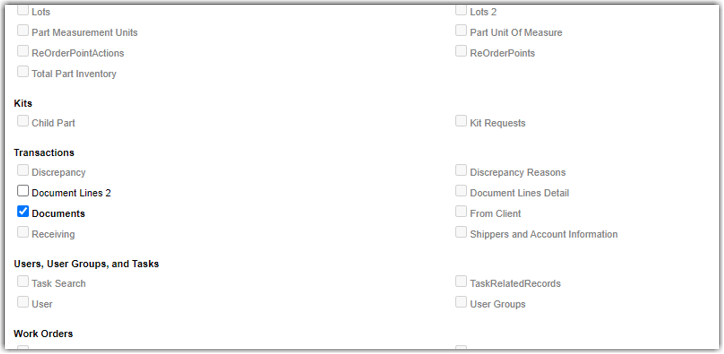
If you click on Documents, you will see sources grayed out, these cannot be linked to the Documents data source:
Click the Continue to Fields button
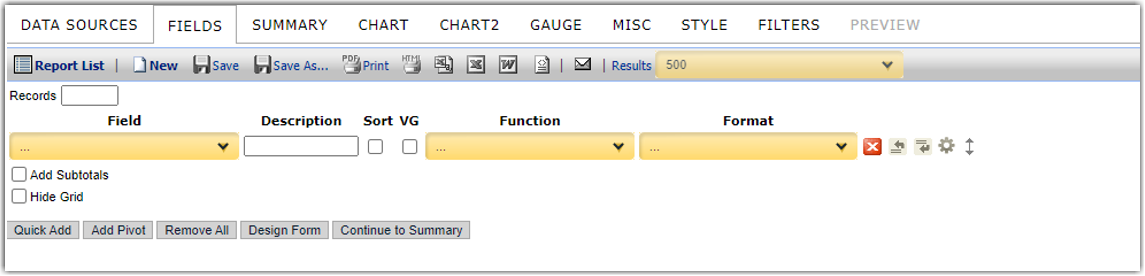
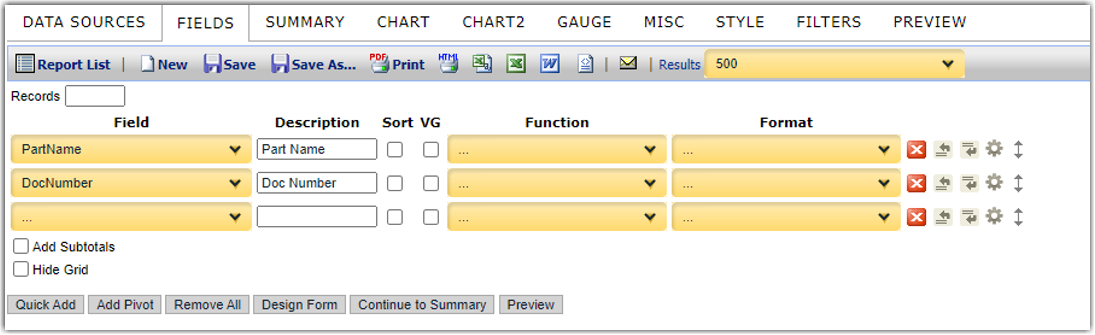
This will be the main tab you use to build your report. In our example report, we want the part number and the order number, click the dropdown under the ‘Field’ column:
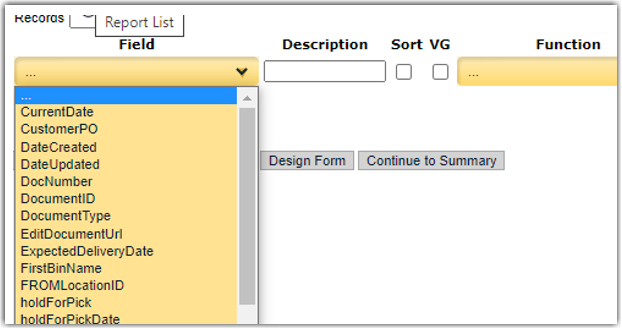
You will notice that while the ‘DocNumber’ (which is the order number) is available, there seems to be no option for the part number. That is because the part number does not reside under the Documents data source, and we will need to find and add the needed data source.
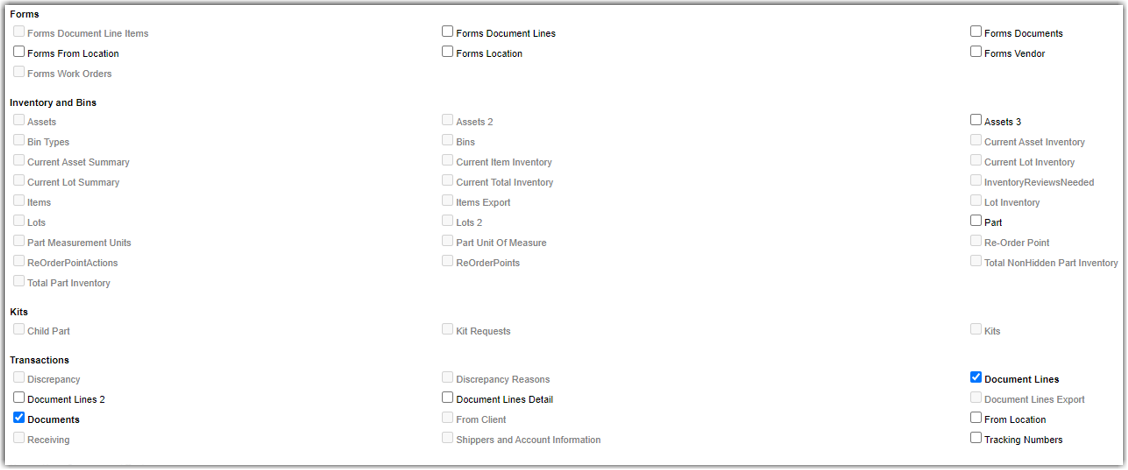
If you go back to the data source tab, the option for ‘Part’ is grayed out, which means it does not connect to the Documents source. In this case, we will want to add the “Document Lines” data source.
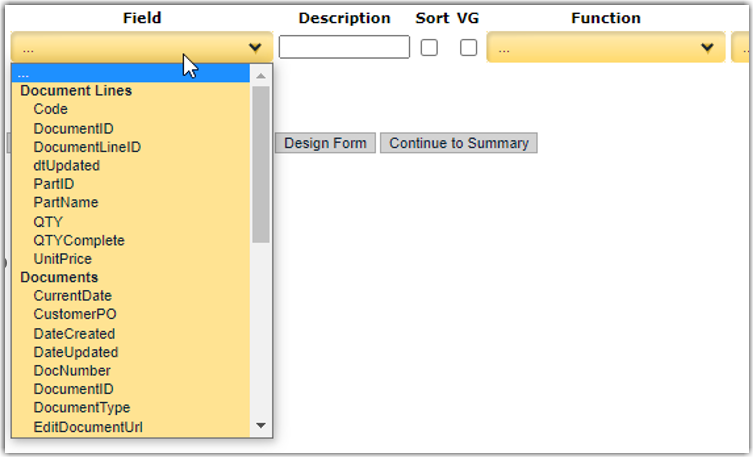
You will notice you can now select the ‘Parts’ source, however, we will not do that unless needed, as data sources should not be added unless you need them.
Back to the fields, and again selecting the drop-down under the ‘Field’ column now provides us with more information:
We can now build our report.
We can now click on the Preview to preview what the report looks like currently:
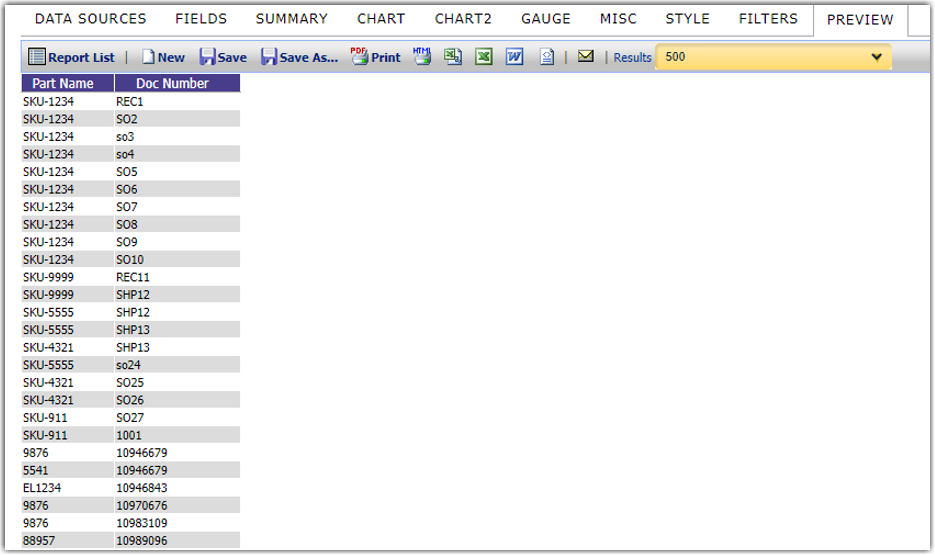
One thing to consider is what if you have a part that is not on any orders? It will not show in this report.
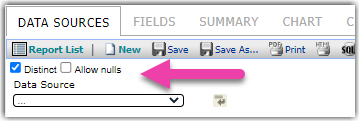
If you go back to the Data Sources tab, you can check the ‘Allow nulls’ checkbox:
The last tab we will look at during this report creation is the ‘Filters’ tab, this tab allows you to set filters on the information you want to see:
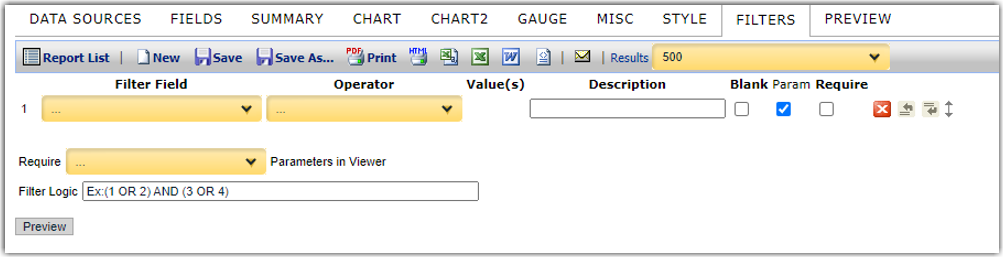
In this example, let’s say we only want to see orders that have not been shipped, to see what orders we currently have for our parts, click on the ‘Filter Field’ dropdown, and you will be able to select the same fields as from the ‘Fields’ tab to place filters on them:

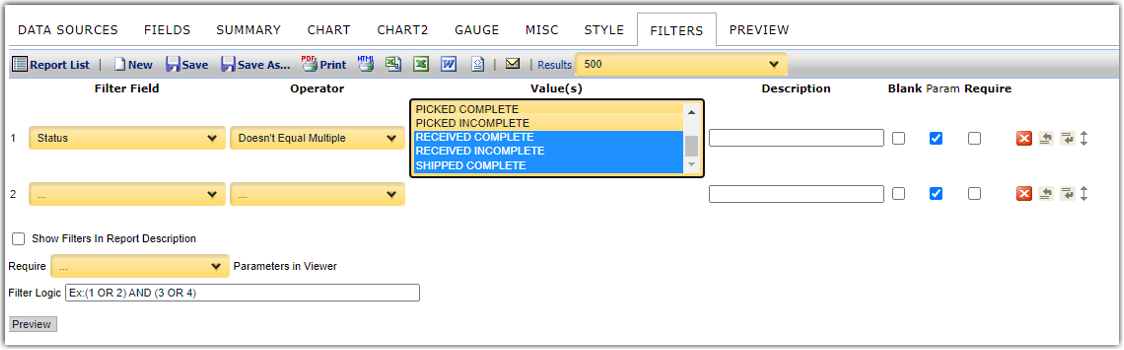
We’ve added a filter for the document status and chosen ‘Doesn’t Equal Multiple’ so we can select multiple statuses we don’t want to show.
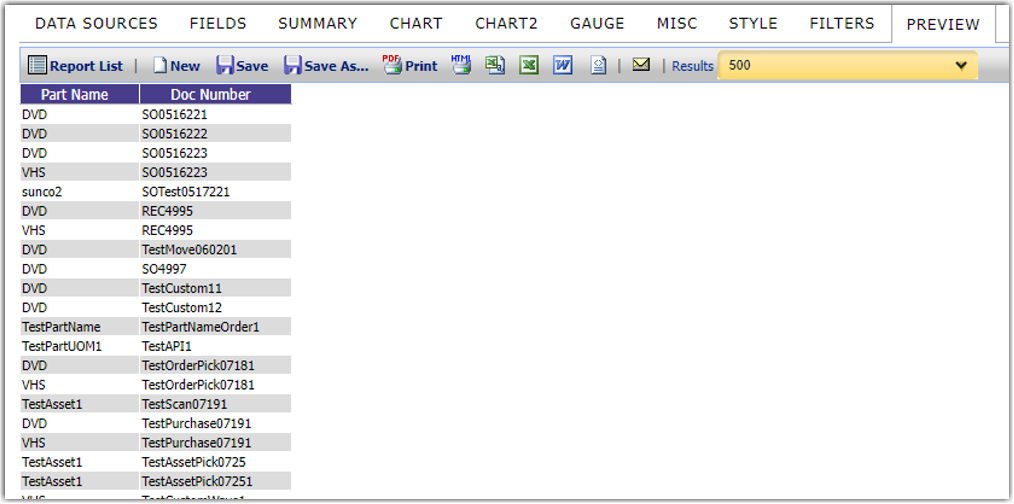
Click Preview, and this is how our report looks now:
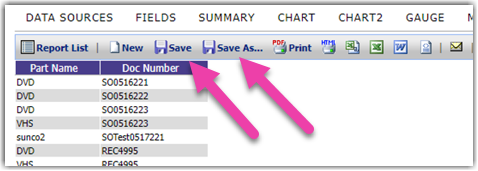
Save your report by clicking the Save or Save As button
Editing a Report
Now that you have a report created, you can edit it to change or add information. We will continue to use the Parts/Orders report that was created in the previous step.
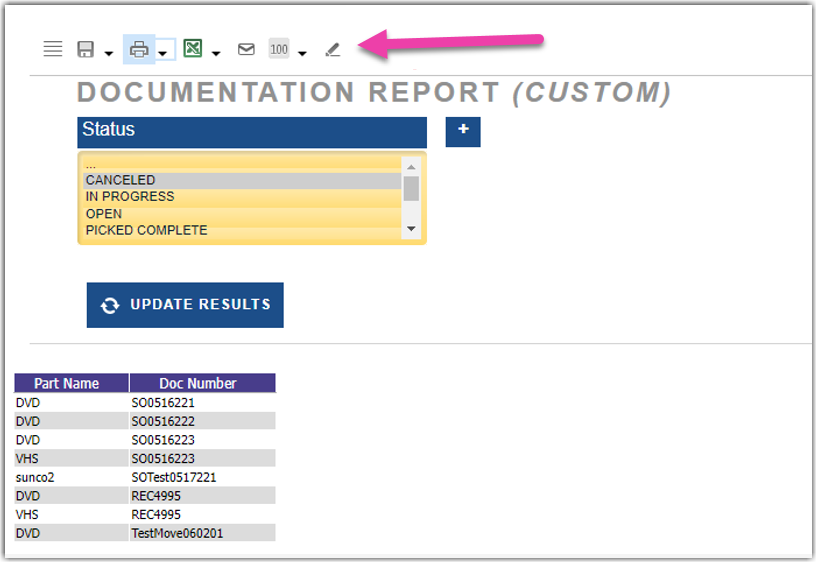
In the report you want to edit, click the Pencil icon near the top to edit the report:
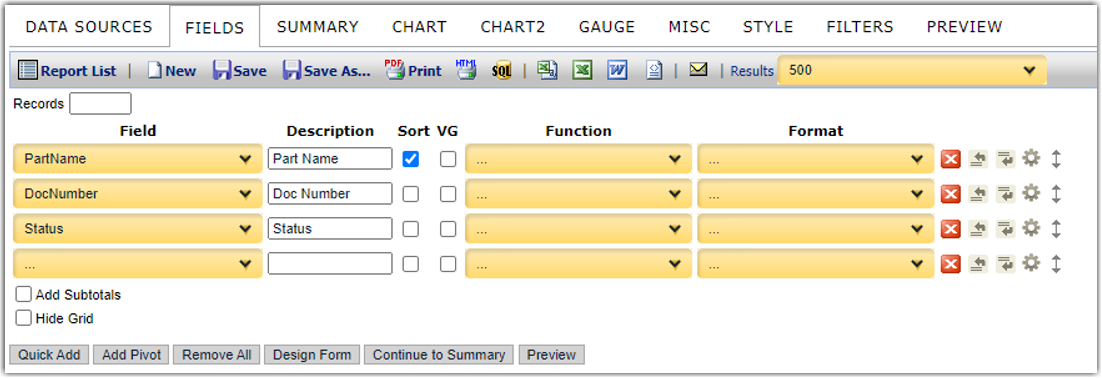
Navigating the tabs will be the same as during creation. In this example, we will want to update the report to sort by part number and add the status to the report:
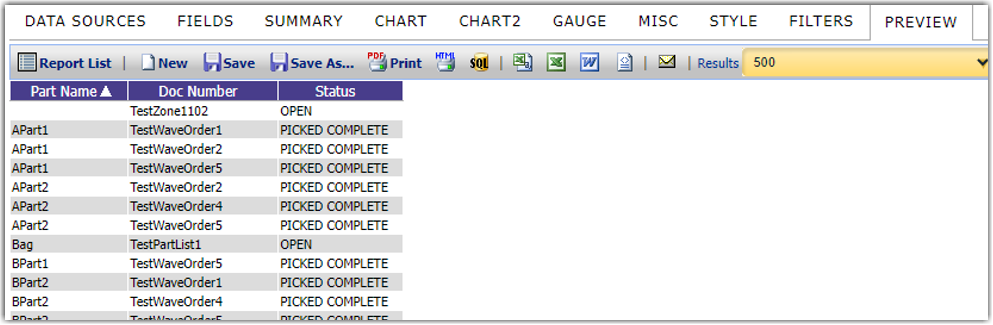
We can still preview our changes:
Click Save or Save As when done.
Advanced Features
We will go over a few features that can improve your report.
Visually Grouping
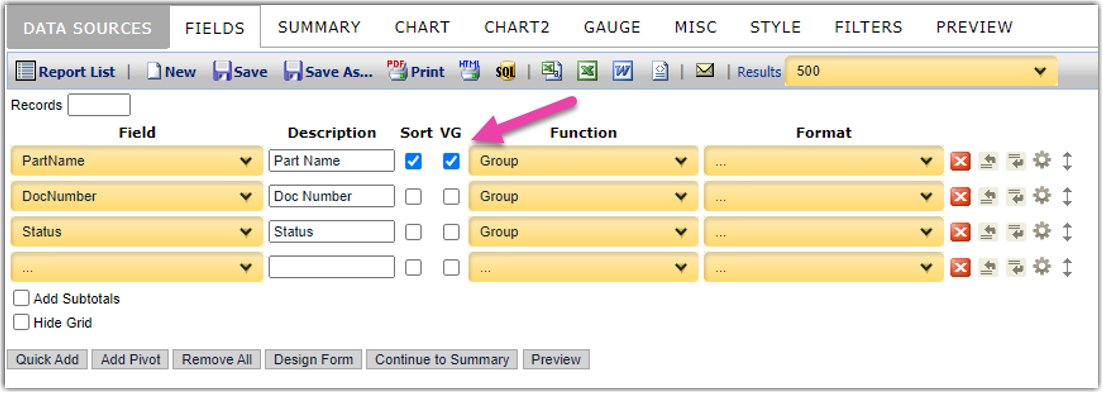
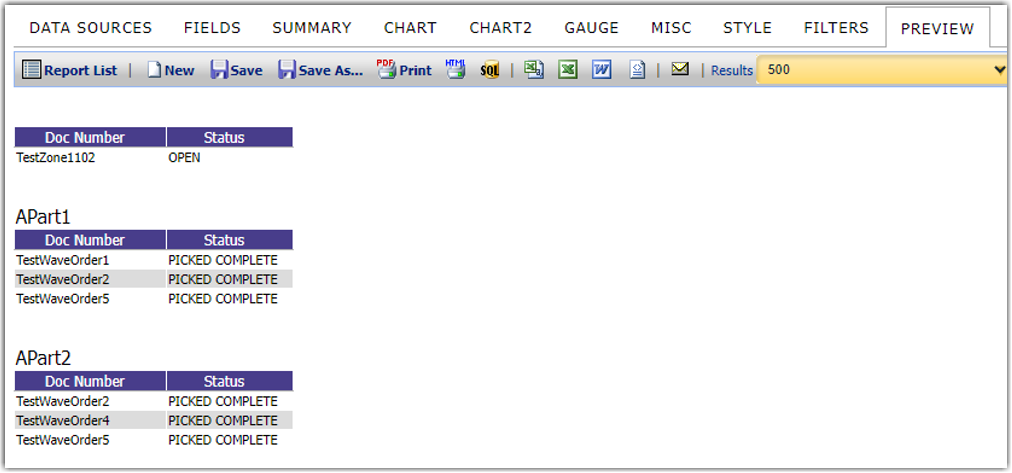
This results in this report, which visually groups the parts:
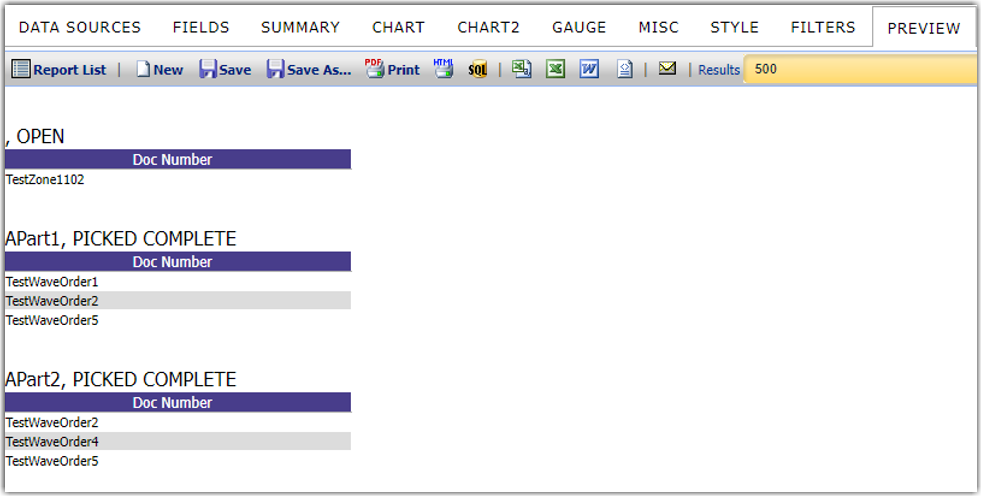
You can choose to visually group more than one column:
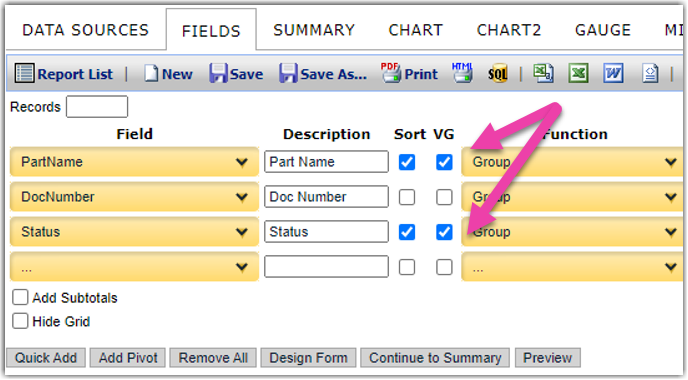
Which results in this report:
Summary
The report summary will be at the top of the report and can be used to summarize information on the report itself.
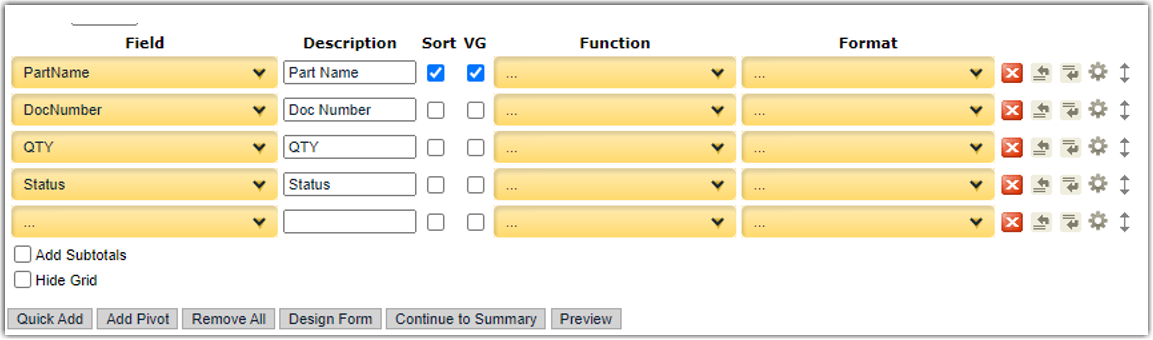
Note, We have now added the QTY on the order to the report:
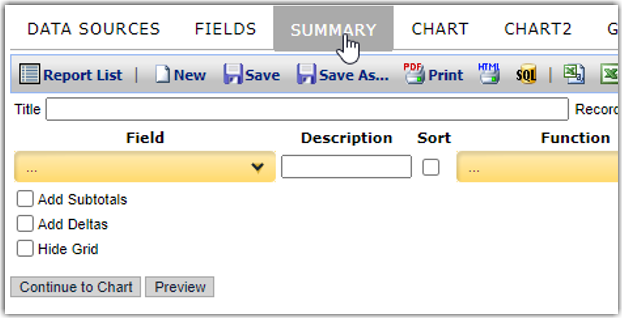
To add a summary, click the Summary tab:
In this summary example, I want a summary of my parts and the number of orders they are currently on:
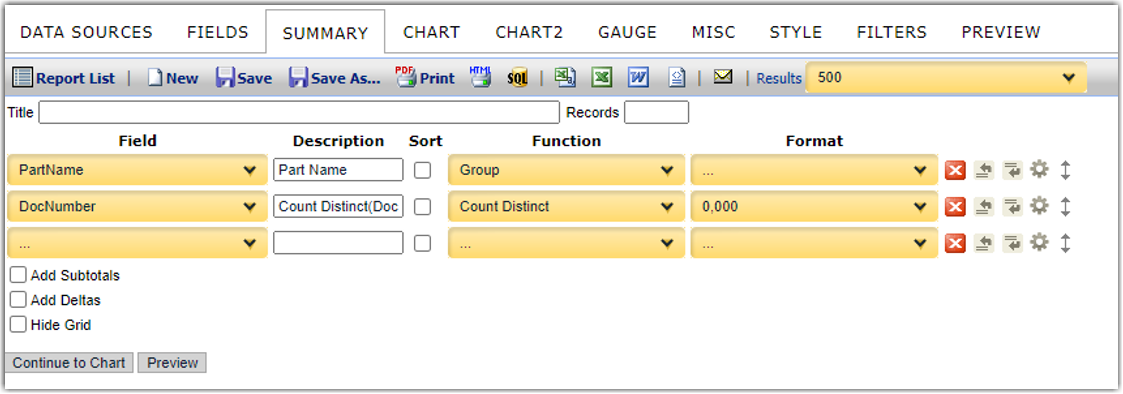
Functions
Note the function dropdown, where we have selected ‘Count Distinct to count the distinct number of orders the part is on. Functions will not be covered in this guide but can be used to count, sum, group, average, and further manipulate data.
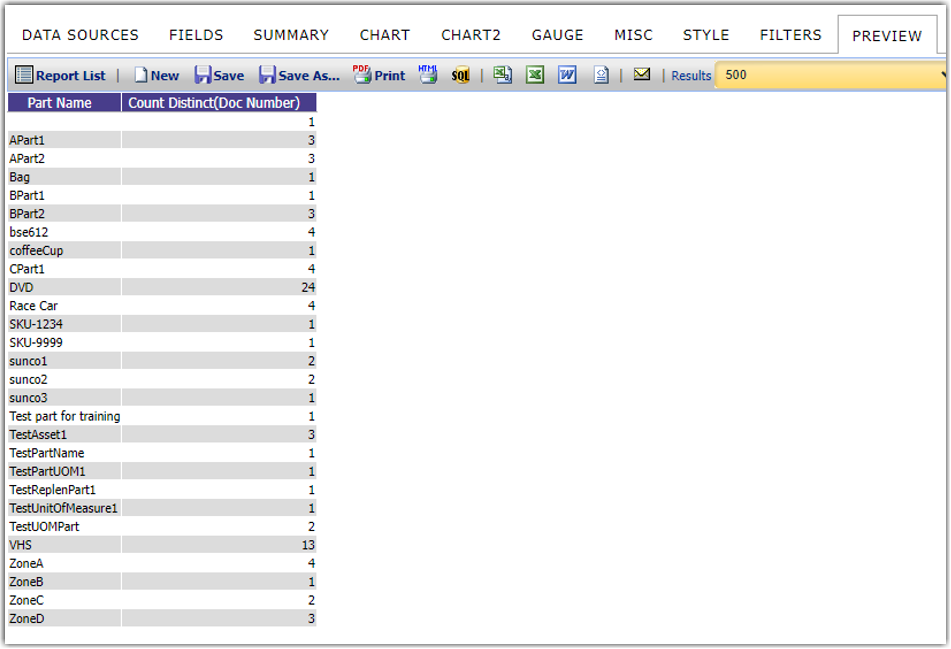
This results in this report:
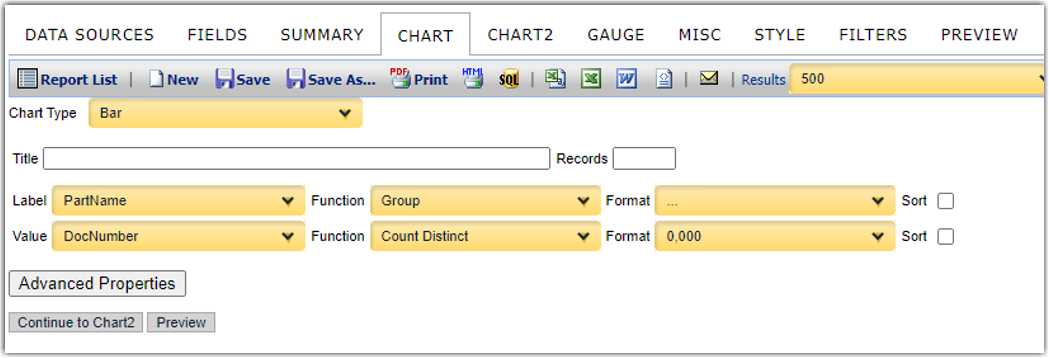
Charts
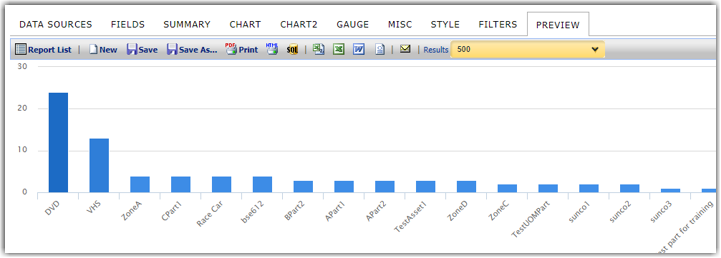
From the example above, click on Continue to Chart, and clicking Preview will result in this:
Highlighting
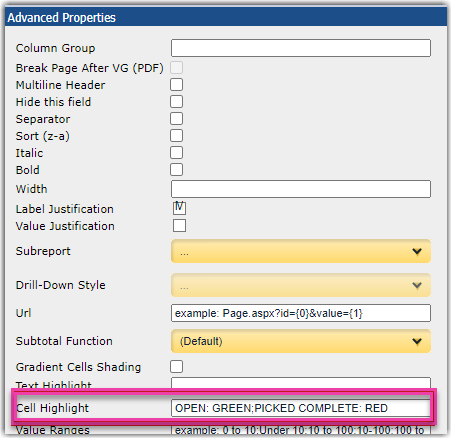
In the ‘Fields’ tab, you can click on the gear icon next to a field to access advanced features:
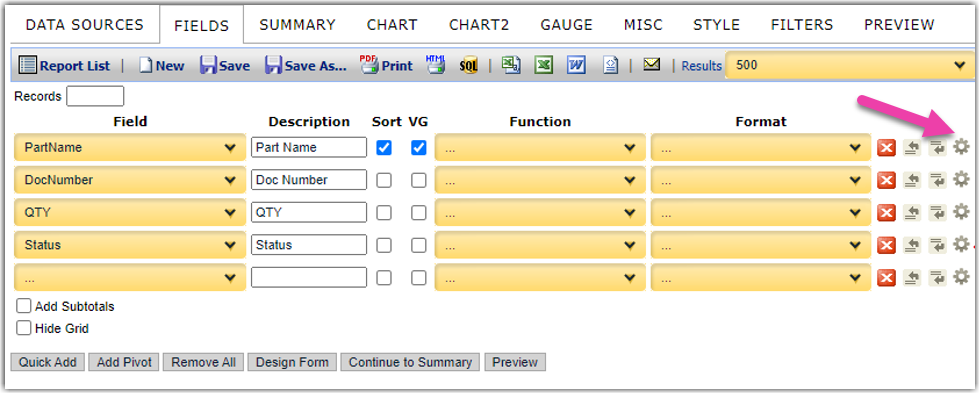
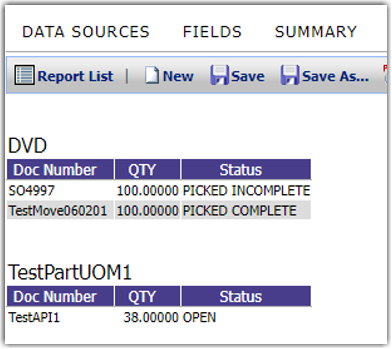
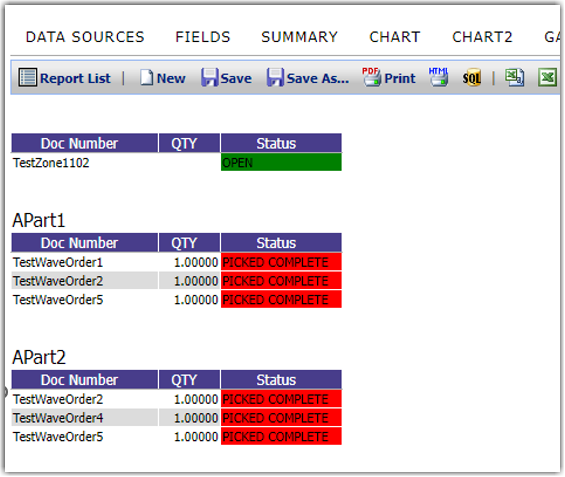
In this example, I will highlight orders that are in an ‘OPEN’ status with green, and orders that are in ‘PICKED INCOMPLETE’ with red:
Then the result would be:
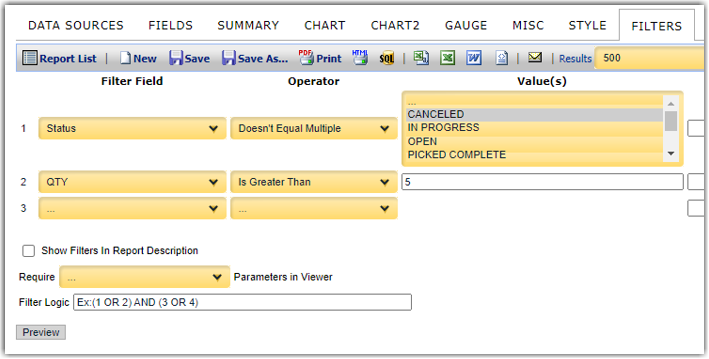
Filter Logic
In this example, we will only want to show orders that have more than five of a part on them:
Which results in: